Robert's Coding Course
Learn Python. Build games. Go from zero to building your own dungeon crawler.
Welcome to your coding course. By the end of this, you're going to build your own dungeon crawler game — a simplified version of something like Minecraft Dungeons, built entirely by you, from scratch. It won't look as polished as a real game studio's work, but it'll be yours, and you'll understand every single line of code in it.
But we're not starting there. We're starting small, building up, and every concept leads toward the games you'll make later.
Hello World
Write your very first Python program and make your computer say something.
Every game, app, and website you've ever used started with someone writing their first line of code — just like you're about to. Minecraft? Started as a simple Java program. Fortnite? Somebody had to write the very first line. This is where it all begins.
Setting Up
If you followed the setup steps above, you should already have VS Code and Python
installed, and a coding-course folder on your Desktop.
- Open VS Code (Cmd + Space, type "Visual Studio Code", hit Enter)
- Click File → Open Folder and select the
coding-coursefolder - Click the New File icon and name it
hello.py - Open the Terminal: Terminal → New Terminal
Your First Program
Type this in hello.py:
print("Hello, world!")Now run it in your terminal:
python3 hello.pyYou should see:
Hello, world!
That's it. You just wrote a program. print() tells Python to display whatever you put inside the parentheses.
Every video game uses print() (or something like it) behind the scenes. When Minecraft shows "Respawn?" or Fortnite shows your elimination count — that's the game printing text to the display.
Comments
Sometimes you want to write a note just for yourself that Python completely ignores. Use a #:
# This is a note to myself — Python skips this
print("But this line runs!")

print("Hi")  # Notes at the end of a line work too
Comments are only for you. They're like sticky notes on your code.
Make a new file called ascii_art.py and use print() to draw a Creeper face! Use # for the dark pixels and spaces for the light ones.
Variables
Learn how to store and update values using variables — the building blocks of every program.
Every game you've ever played uses variables. In Minecraft, your health is a variable. Your hunger bar is a variable. The number of diamonds in your inventory? Variable. When a Creeper explodes near you and your health drops from 20 to 8 — that's a variable being updated.
What's a Variable?
A variable is a name that stores a value. Create variables.py:
name = "Robert"
age = 11
print(name)
print(age)= does NOT mean "equals" in Python. It means "store this value." Think of it as an arrow: name ← "Robert"
Updating Variables
Variables can change — that's why they're called variables:
health = 100
print(health)

health = 75
print(health)
The old value (100) is gone. Python only remembers the latest value.
Create a character card with name, level, health, weapon, and armor. Print them all out!
Math
Learn how to do math in Python, combine it with variables, and use randomness — a key ingredient in every game.
Games are full of math. When a Creeper explodes in Minecraft, the game calculates the distance to every nearby block and figures out the damage. When you boost in Mario Kart, the game multiplies your speed by 1.5. When loot drops in Zelda, the game rolls a random number to decide what you get. Let's learn how Python does math.
Basic Operators
Create math_stuff.py:
print(10 + 3)    # 13  (addition)
print(10 - 3)    # 7   (subtraction)
print(10 * 3)    # 30  (multiplication)
print(10 / 3)    # 3.333...  (division)
print(10 // 3)   # 3   (division, rounded down)
print(10 ** 3)   # 1000 (power — 10 × 10 × 10)
print(10 % 3)    # 1   (remainder — "modulo")
That last one, % (modulo), is surprisingly useful in games. Want to check if a number is even or odd? number % 2 gives you 0 for even, 1 for odd. Want something to happen every 10th frame? frame % 10 == 0.
Math with Variables
Here's where it gets powerful — combine math with variables:
health = 100
damage = 25

health = health - damage
print(health)    # 75

health = health - damage
print(health) # 50Remember: = does NOT mean "equals" in Python. It means "store this value." When you write health = health - damage, you're saying: "take the current health, subtract the damage, and store the result back in health." It's like updating a scoreboard, not solving a math equation.
There's a shorthand for this that you'll see a lot:
score = 0
score += 10    # same as: score = score + 10
score += 10    # score is now 20
score -= 5     # same as: score = score - 5, score is now 15
score *= 2     # same as: score = score * 2, score is now 30
Randomness
Here's something every game needs: random numbers. When a zombie spawns in Minecraft, its position is random. When you open a chest in Zelda, the loot is random. When an F1 car has a mechanical failure, it's (simulated) random.
Python has a built-in tool for this called random:
import random

# Random integer between 1 and 6 (like rolling a dice)
dice = random.randint(1, 6)
print("You rolled a", dice)

# Random integer between 1 and 100
number = random.randint(1, 100)
print("Secret number:", number)
import random loads Python's random number toolkit. You only need to write it once at the top of your file.
Computers can't actually be truly random — they use complex math formulas that look random but are completely predictable if you know the starting number (called a "seed"). That's why Minecraft lets you enter a world seed — the same seed always generates the same world!
We'll learn more ways to use random numbers — like picking from a list of items, or creating loot drop chances — once we learn about lists and conditions in later lessons. For now, just know that random is one of the most important tools in game development.
Build: Battle Stats
Create battle.py — a quick program that simulates a game combat round:
import random

player_attack = 15
enemy_armor = 4
bonus = random.randint(0, 5)

damage = player_attack - enemy_armor + bonus

enemy_health = 50
enemy_health = enemy_health - damage

print("Attack power:", player_attack)
print("Enemy armor:", enemy_armor)
print("Random bonus: +" + str(bonus))
print("Damage dealt:", damage)
print("Enemy health remaining:", enemy_health)
Run it a few times — you'll get different damage each time because of the random bonus. This is exactly how damage formulas work in games like Zelda and Minecraft Dungeons.
Types
Understand the four basic types of data in Python: strings, integers, floats, and booleans.
Games need to keep track of different kinds of information. Your player name is text, your health is a whole number, your exact position is a decimal, and whether you're alive is true/false. Python calls these different types, and understanding them is how you stop your code from doing weird things — like trying to subtract "hello" from 42.
Every Value Has a Type
Python keeps track of what kind of data each value is. Create a file called types.py:
print(type("hello"))    # <class 'str'>
print(type(42))         # <class 'int'>
print(type(3.14))       # <class 'float'>
print(type(True))       # <class 'bool'>
The type() function tells you what kind of thing you're looking at.
Strings (str)
A string is text. Always in quotes — single or double, doesn't matter:
greeting = "Hello!"
name = 'Robert'
You can stick strings together with +:
first = "Shadow"
last = "Knight"
full = first + " " + last
print(full)    # Shadow Knight
Integers (int)
An integer is a whole number — no decimal point:
health = 100
score = 0
lives = 3
You can do math with them:
print(10 + 3)     # 13
print(10 - 3)     # 7
print(10 * 3)     # 30
print(10 // 3)    # 3 (division, rounded down)
print(10 % 3)     # 1 (remainder — "modulo")
Floats (float)
A float is a number with a decimal point:
temperature = 98.6
pi = 3.14159
price = 4.99
Booleans (bool)
A boolean is either True or False. That's it — only two options:
is_alive = True
game_over = False
In Minecraft, the game is constantly tracking booleans: is_raining = True, is_player_sneaking = False, has_elytra_equipped = True. Every on/off state in a game is a boolean.
These become super important when we get to if-statements (Lesson 6).
Watch Out: Strings vs Numbers
This trips everyone up:
print(5 + 3)       # 8 — math!
print("5" + "3")   # "53" — glued two strings together!
"5" (with quotes) is text. 5 (no quotes) is a number. They're completely different.
Build: Type Detective
Create type_detective.py:
a = "100"
b = 100
c = 100.0
d = True

print(a, "is", type(a))
print(b, "is", type(b))
print(c, "is", type(c))
print(d, "is", type(d))

# Can you predict these?
print(type(a + "hello"))
print(type(b + 50))
print(type(b + c))
Run it and see if your predictions were right!
f-strings
Learn how to mix variables into text with f-strings so your output looks clean.
Think about any game's HUD (heads-up display). In Minecraft, it shows "Health: 20" and in Mario Kart it shows "Lap 2/3". That text mixes words with changing numbers — and f-strings are exactly how programmers do that.
The Problem
In Lesson 2, our character card just printed raw values with no labels. We could glue strings together with +, but it gets ugly fast:
name = "Robert"
score = 42
print("Player: " + name + " | Score: " + str(score))
You have to convert numbers to strings with str(), and all those + signs and quotes are confusing. There's a better way.
f-Strings to the Rescue
Put an f before the opening quote, then use {} to drop variables right into the text. Create fstrings.py:
name = "Robert"
score = 42
print(f"Player: {name} | Score: {score}")
Output: Player: Robert | Score: 42
That's it. The f stands for "format." Python sees the curly braces and swaps in the variable values.
You Can Do Math Inside the Braces
price = 4.99
quantity = 3
print(f"Total: ${price * quantity}")
Output: Total: $14.97
Anything inside {} gets evaluated as Python code first, then turned into text.
F1 racing games display things like "LAP 23/57 — Gap: 1.234s" on screen. Behind the scenes, that's built with something very similar to f-strings: f"LAP {current_lap}/{total_laps} — Gap: {gap}s".
Build: Better Character Card
Create character_card.py:
name = "Shadow Knight"
health = 100
attack = 25
defense = 15
level = 1

print(f"╔══════════════════════╗")
print(f"║  {name:^18}  ║")
print(f"╠══════════════════════╣")
print(f"║  Health:  {health:>10}  ║")
print(f"║  Attack:  {attack:>10}  ║")
print(f"║  Defense: {defense:>10}  ║")
print(f"║  Level:   {level:>10}  ║")
print(f"╚══════════════════════╝")
The >10 means "right-align in a space 10 characters wide." The ^18 means "center in 18 characters." These are optional formatting tricks — the basic {variable} is all you really need.
Run it with python3 character_card.py and admire your fancy output!
Input
Make your programs interactive by asking the user to type stuff in.
Without input, a program just does the same thing every time — boring! Input is what makes programs interactive. When Minecraft asks you to name an enchanted sword, or when you type your username to log in to Fortnite — that's input. Your program is about to start listening.
Getting Text from the User
The input() function pauses your program and waits for the user to type something. Create asking.py:
name = input("What is your name? ")
print(f"Hello, {name}!")
Run it with python3 asking.py. It waits for you to type, then uses what you typed.
Here's the flow:
- Ask —
input("question")shows the question and waits - Store — the answer goes into a variable
- Use — you do something with it
Numbers Need Converting
Here's a gotcha: input() always gives you a string, even if the user types a number:
age = input("How old are you? ")
print(type(age))    # <class 'str'> — it's text, not a number!
If you want to do math with it, wrap it in int():
age = int(input("How old are you? "))
next_year = age + 1
print(f"Next year you'll be {next_year}!")
int() converts the text "11" into the number 11. Without it, age + 1 would crash because Python can't add a string and a number.
Build: Mad Libs
Create mad_libs.py:
print("=== MAD LIBS ===")
print()

animal = input("Give me an animal: ")
food = input("Give me a food: ")
number = input("Give me a number: ")
verb = input("Give me a verb (like 'run' or 'dance'): ")
place = input("Give me a place: ")

print()
print("=== YOUR STORY ===")
print(f"One day, a {animal} walked into {place}.")
print(f"It ordered {number} plates of {food}.")
print(f'The waiter said "That\'s a lot of {food}!"')
print(f"So the {animal} started to {verb} on the table.")
print("The end.")
Try it with the silliest words you can think of!
If / Else
Make your program choose what to do based on a condition.
In Mario Kart, the game is constantly checking: Did you hit a banana peel? Did you cross the finish line? Did you fall off the track? Every one of those checks is an if statement. Without if, games would be completely brain-dead — nothing could react to anything.
Making Decisions
Up until now, Python runs every line top to bottom, no exceptions. But what if you want it to do something only when a condition is true? That's what if does. Create decisions.py:
age = int(input("How old are you? "))

if age >= 13:
    print("You're a teenager!")
If the age is 13 or more, it prints the message. Otherwise, it does nothing and moves on.
Important: the indented line (4 spaces) is the code that runs only when the condition is true. Indentation matters in Python!
Adding Else
What if you want to handle both cases?
age = int(input("How old are you? "))

if age >= 13:
    print("You're a teenager!")
else:
    print("You're not a teenager yet!")
else catches everything that the if didn't.
Multiple Paths with Elif
Sometimes there are more than two options. Use elif (short for "else if"):
age = int(input("How old are you? "))

if age >= 18:
    print("You're an adult!")
elif age >= 13:
    print("You're a teenager!")
else:
    print("You're a kid!")
Python checks each condition from top to bottom and runs the first one that's true. Then it skips the rest.
This is exactly how Zelda decides what happens when you throw an item: if it's a bomb, it explodes. Elif it's food, a nearby NPC might run to grab it. Else, it just lands on the ground.
You Can Have Multiple Lines Inside
Everything indented under an if runs together:
score = 95

if score >= 90:
    print("Amazing!")
    print("You got an A!")
    print("Keep it up!")
All three lines run because they're all indented under the if.
Build: Age Checker
Create age_checker.py:
name = input("What's your name? ")
age = int(input("How old are you? "))

print(f"\nHello, {name}!")

if age >= 16:
    print("You can drive!")
elif age >= 13:
    print("You can watch PG-13 movies!")
elif age >= 10:
    print("You're in double digits!")
else:
    print("You're still young — enjoy it!")

print(f"\nYou'll be {age + 1} next year!")
Try running it with different ages to see all the paths!
Comparisons
Learn all the comparison operators and how to combine them with and, or, and not.
Every game is constantly comparing things. Is your health greater than zero? Is your speed faster than the other racer? Did the player press the right button? In F1 games, the game compares your lap time against the leader's time every single frame. Comparisons are how programs make smart decisions.
The Comparison Operators
You already used >= in Lesson 6. Here's the full set. Create comparisons.py:
x = 10

print(x == 10)    # True  — "is equal to"
print(x != 5)     # True  — "is NOT equal to"
print(x > 5)      # True  — "greater than"
print(x < 20)     # True  — "less than"
print(x >= 10)    # True  — "greater than or equal to"
print(x <= 9)     # False — "less than or equal to"
Each one gives back True or False — a boolean.
Watch out: == (two equals signs) checks if things are equal. = (one equals sign) stores a value. Mixing them up is a super common mistake.
Combining with and
and means both conditions must be true:
age = 15
has_ticket = True

if age >= 13 and has_ticket:
    print("You can enter!")
In Fortnite, you can only build if has_materials and not is_swimming. Both conditions must be true at the same time.
Combining with or
or means at least one condition must be true:
day = "Saturday"

if day == "Saturday" or day == "Sunday":
    print("It's the weekend!")
Flipping with not
not flips True to False and False to True:
is_raining = False

if not is_raining:
    print("Let's go outside!")
Strings Can Be Compared Too
answer = input("What's the password? ")

if answer == "secret123":
    print("Access granted!")
else:
    print("Wrong password!")
Build: Quiz Game
Create quiz.py:
score = 0

answer = input("What planet is closest to the sun? ")
if answer == "Mercury" or answer == "mercury":
    print("Correct!")
    score = score + 1
else:
    print("Nope — it's Mercury!")

answer = int(input("What is 7 * 8? "))
if answer == 56:
    print("Correct!")
    score = score + 1
else:
    print("Nope — it's 56!")

answer = input("True or False: Python is named after a snake. ")
if answer == "False" or answer == "false":
    print("Correct! It's named after Monty Python.")
    score = score + 1
else:
    print("Nope — it's named after the comedy show Monty Python!")

print(f"\nYou got {score} out of 3!")

if score == 3:
    print("Perfect score!")
elif score >= 2:
    print("Nice job!")
else:
    print("Better luck next time!")
While Loops
Learn how to make code repeat with while loops — including the powerful while True + break pattern.
Think about Minecraft — the game is constantly checking: Is it daytime? Are there mobs nearby? Is the player moving? That's a loop running 20 times per second, checking everything over and over. Every game you've ever played is powered by a loop that never stops running until you quit.
Why Loops?
Imagine you want a password checker that keeps asking until you get it right. Without loops, you'd have to copy-paste the same code a hundred times and hope the user gets it within that many tries. Loops let you repeat code as many times as needed.
while True + break
This is the most common loop pattern in games. Create password.py:
while True:
    guess = input("Enter the password: ")
    if guess == "secret":
        print("Access granted!")
        break
    print("Wrong! Try again.")
Here's how it works:
while True:means "keep looping forever"breakmeans "stop the loop right now"- So it keeps asking until you type "secret", then
breakescapes the loop
This is the exact same pattern every game uses for its game loop. The game runs while True: to keep going forever, and when you press Escape or choose "Quit to Menu," that's a break.
while with a Condition
You can also loop while something is true:
countdown = 5
while countdown > 0:
    print(countdown)
    countdown = countdown - 1
print("Blastoff!")
When countdown reaches 0, the condition countdown > 0 becomes False and the loop stops.
Counters
A counter is a variable that keeps track of how many times something happened:
attempts = 0

while True:
    guess = input("Guess the password: ")
    attempts = attempts + 1

    if guess == "python":
        print(f"Got it in {attempts} tries!")
        break
    print("Nope!")
Build: Countdown Timer
Create countdown.py:
import time

number = int(input("Count down from what number? "))

while number > 0:
    print(number)
    time.sleep(1)
    number = number - 1

print("BLASTOFF! 🚀")
The time.sleep(1) pauses for 1 second between each number. Run it and watch it count down in real time!
Build: Dice Roller
Now that you know while True, let's combine it with the random module from the Math lesson. Create dice.py:
import random

print("🎲 Dice Roller 🎲")
print()

while True:
    input("Press Enter to roll (or Ctrl+C to quit)... ")

    die1 = random.randint(1, 6)
    die2 = random.randint(1, 6)
    total = die1 + die2

    print(f"  Die 1: {die1}")
    print(f"  Die 2: {die2}")
    print(f"  Total: {total}")

    if total == 12:
        print("  🎉 DOUBLE SIXES!")
    elif total == 2:
        print("  💀 Snake eyes!")

    print()
This uses everything: while True keeps it running, random.randint rolls the dice, if/elif checks for special rolls, and f-strings display the results. Run it and keep rolling!
For Loops
Learn for loops with range() and build patterns with nested loops.
When a game needs to do something a specific number of times, it uses a for loop. When Minecraft generates a new chunk, it loops through every single block position and decides what goes there — stone, dirt, diamond ore. When Mario Kart draws the 12 racers on the results screen, it loops through each one. for loops are how you say "do this exactly N times."
for i in range()
A for loop runs a specific number of times. Create forloops.py:
for i in range(5):
    print(i)
Output: 0, 1, 2, 3, 4 (each on its own line). It starts at 0 and stops before 5.
range() Variations
# Start at 1, stop before 6
for i in range(1, 6):
    print(i)    # 1, 2, 3, 4, 5

# Count by 2s
for i in range(0, 10, 2):
    print(i)    # 0, 2, 4, 6, 8

# Count backwards
for i in range(5, 0, -1):
    print(i)    # 5, 4, 3, 2, 1
The three numbers are: start, stop, step.
for with Strings
You can loop through the characters of a string:
name = "Robert"
for letter in name:
    print(letter)
This prints each letter on its own line: R, o, b, e, r, t.
Nested Loops
A loop inside a loop. The inner loop runs completely for each step of the outer loop:
This is how games draw grids. Every tile-based game — from Minecraft's inventory screen to Zelda's map — uses nested loops: one loop for rows, one loop for columns.
for row in range(3):
    for col in range(5):
        print("*", end="")
    print()
Output:
*****
*****
*****
The end="" tells print not to make a new line — so all the stars in one row stay on the same line. The print() at the end of each row makes a new line.
Build: Star Patterns
Create stars.py:
# Triangle
size = int(input("How big? "))

for row in range(1, size + 1):
    for col in range(row):
        print("*", end="")
    print()
If you enter 5, you get:
*
**
***
****
*****
Challenge: Can you make it print upside-down? (Hint: start row at size and count down.)
Lists
Learn how to store collections of items in a list — creating, reading, changing, adding, removing, and searching.
In Minecraft, your hotbar is a list of 9 items. Your inventory is a bigger list. The list of players on a Fortnite server? That's a list too. Whenever a game needs to keep track of multiple things in order, it uses a list.
What's a List?
A variable holds one thing. A list holds a bunch of things in order. Create lists.py:
fruits = ["apple", "banana", "cherry"]
print(fruits)
Square brackets [] make a list. Commas separate the items.
Accessing Items by Index
Each item has a position number called an index, starting at 0:
fruits = ["apple", "banana", "cherry"]
print(fruits[0])    # apple
print(fruits[1])    # banana
print(fruits[2]) # cherryYour Minecraft hotbar slots are actually numbered 0-8 internally, even though the game shows them as 1-9 on screen. Programmers start counting at zero everywhere!
You can count from the end with negative numbers:
print(fruits[-1])    # cherry (last item)
print(fruits[-2])    # banana (second to last)
Changing Items
Just assign to an index:
fruits[1] = "mango"
print(fruits)    # ['apple', 'mango', 'cherry']
How Long Is It?
len() tells you how many items are in a list:
print(len(fruits)) # 3Adding Items with append()
append() sticks a new item on the end. Think about picking up items in Zelda — every time you grab a Hylian Shroom, the game appends it to your inventory.
backpack = ["sword", "shield"]
backpack.append("potion")
print(backpack)    # ['sword', 'shield', 'potion']
Removing Items
pop() removes by position and gives you the item back:
items = ["apple", "banana", "cherry"]
removed = items.pop(1)
print(removed)    # banana
print(items)      # ['apple', 'cherry']
remove() removes by value — it finds the item and deletes it:
pets = ["cat", "dog", "fish", "dog"]
pets.remove("dog")
print(pets)    # ['cat', 'fish', 'dog'] — only removes the first one!
Checking If Something Is in a List
The in keyword checks if an item exists:
fruits = ["apple", "banana", "cherry"]

if "banana" in fruits:
    print("We have bananas!")

if "mango" not in fruits:
    print("No mangos :(")
Looping Through a List
Use a for loop to go through every item:
colors = ["red", "green", "blue"]
for color in colors:
    print(f"I like {color}!")
Build: Shopping List
Create shopping.py — a mini app that lets you add and remove items:
shopping = []

while True:
    print(f"\nShopping list: {shopping}")
    print("1. Add item")
    print("2. Remove item")
    print("3. Quit")

    choice = input("Pick 1, 2, or 3: ")

    if choice == "1":
        item = input("What to add? ")
        shopping.append(item)
        print(f"Added {item}!")
    elif choice == "2":
        item = input("What to remove? ")
        if item in shopping:
            shopping.remove(item)
            print(f"Removed {item}!")
        else:
            print("That's not on the list!")
    elif choice == "3":
        print("Bye!")
        break
    else:
        print("Pick 1, 2, or 3!")
Guessing Game
Combine everything you've learned — variables, input, if-else, comparisons, loops, and lists — to build a real number guessing game.
This is your first real game! It's simple, but it uses the same building blocks as every game ever made: storing data (variables), getting player input, making decisions (if/else), and repeating until something happens (loops). By the end, you'll have something your friends can actually play.
The Plan
The computer picks a random number between 1 and 100. You guess, and it tells you "too high" or "too low" until you get it right.
This uses:
- Variables to store the secret number and guess count
- Input to get guesses from the player
- If-elif-else to check if the guess is right, too high, or too low
- While loop to keep the game going
- f-strings to show feedback
The Code
Create guessing_game.py:
import random

secret = random.randint(1, 100)
guesses = 0

print("I'm thinking of a number between 1 and 100.")
print()

while True:
    answer = int(input("Your guess: "))
    guesses = guesses + 1

    if answer == secret:
        print(f"You got it in {guesses} guesses!")
        break
    elif answer > secret:
        print("Too high!")
    else:
        print("Too low!")
Run it with python3 guessing_game.py and try to beat it!
How It Works
random.randint(1, 100)picks a random number and stores it insecret- The
while Trueloop keeps asking for guesses - Each guess increases the counter
- If the guess matches, we print the score and
breakout of the loop - Otherwise, we give a hint and loop again
The "hot and cold" guessing mechanic has been used in tons of real games. Zelda's Sheikah Sensor beeps faster as you get closer to a shrine — that's basically the same "too high / too low" feedback loop you just built!
Make It Better
Try adding these features:
Difficulty feedback — tell the player how far off they are:
diff = abs(answer - secret)
if diff > 30:
    print("Way off!")
elif diff > 10:
    print("Getting warmer...")
else:
    print("So close!")
Limit the guesses — give them only 7 tries:
max_guesses = 7

while guesses < max_guesses:
    answer = int(input(f"Guess ({guesses + 1}/{max_guesses}): "))
    guesses = guesses + 1

    if answer == secret:
        print(f"You got it in {guesses} guesses!")
        break
    elif answer > secret:
        print("Too high!")
    else:
        print("Too low!")
else:
    print(f"Out of guesses! The number was {secret}.")
Track all guesses with a list:
all_guesses = []

# Inside the loop, after each guess:
all_guesses.append(answer)
print(f"Your guesses so far: {all_guesses}")
Your First Game
Build a working two-player Connect 4 game that runs right in your terminal.
This is what your terminal game will look like — players taking turns and a winner!
Alright, this is a big one -- we're building an actual game! Connect 4 is the one where you drop colored chips into a grid and try to get four in a row. By the end of this lesson, you'll have a playable version running in your terminal. Let's break down how it works.
The Board Is a Grid
Remember lists from Lesson 10? A list is like a row of boxes. But a Connect 4 board isn't just one row -- it's a grid with rows and columns. That's called a 2D array (two-dimensional array). Think of it like a spreadsheet, or better yet, like graph paper where each square can hold a value.
Minecraft uses the same concept — the world is a giant 3D array of blocks. Each position holds a block type (stone, dirt, air). Our Connect 4 board is a smaller, 2D version of the same idea.
The Connect 4 board is a 2D array — a grid of rows and columns. To access a cell, you use two indices: board[row][col]. Checking for 4 in a row means checking neighbors: board[y][x+1], board[y][x+2], board[y][x+3]. This is the same math that Minecraft uses to check if 4 blocks are connected, or how chess programs check for valid moves.
We're going to use a library called numpy to create our grid. A library is code that someone else wrote that we can use -- no need to reinvent the wheel. numpy is great at working with grids of numbers.
import numpy
world = numpy.zeros((6, 6))
This creates a 6-by-6 grid filled with zeros. Each 0 means "empty." When player 1 drops a chip, we put a 1 there. Player 2 gets a 2.
Connect 4 was first sold in 1974 by Milton Bradley. Mathematicians later proved that if both players play perfectly, the first player can always win! It took until 1988 for a computer to figure that out.
The Game Loop
Our whole game lives inside a while True: loop. You know how games keep running frame after frame until you quit? That's exactly what this does. Every time through the loop, we:
- Draw the board
- Get input from the current player
- Place the chip in the lowest empty row
- Check if someone won (or if it's a draw)
- Switch to the other player
Clearing the Screen
Every time we redraw the board, we want a clean screen. os.system('clear') tells your Mac to clear the terminal. It's like erasing a whiteboard before drawing the board again.
Win Detection
This is the trickiest part. After a chip lands, we need to check if there are four in a row. But "in a row" can mean four directions:
- Horizontal (left to right) -->
- Vertical (top to bottom) |
- Diagonal down-right \
- Diagonal up-right /
We loop through every cell on the board. For each cell that belongs to the current player, we check if the next three cells in each direction also belong to that player. If they do -- winner!
When checking for wins near the edges of the board, you need to make sure you don't look "off the edge." That's what the x <= 2 and y <= 2 checks are for -- they make sure there are enough cells in that direction to check.
Draw Detection
If the entire top row is full and nobody has won, it's a draw. No more chips can be dropped.
Step-by-Step Build
Step 1: Imports and Setup
We need three libraries:
import os       # for clearing the screen
import numpy    # for our 2D grid
And our game variables:
world = numpy.zeros((6, 6))  # the board -- all zeros means all empty
player = 1                    # player 1 goes first
winner = 0                    # no winner yet (0 = nobody)
Step 2: Draw the Board
At the top of our while True: loop, we clear the screen and print the board:
while True:
    os.system('clear')
    print("  1  2  3  4  5  6")
    print("---------------------")
    print(world)
numpy's print(world) shows the grid nicely. The numbers on top help players pick a column.
Step 3: Check for Game Over
Right after drawing, we check if the game is already over:
    if winner < 0:
        print("DRAW")
        exit()
    elif winner > 0:
        print("WINNER - PLAYER: %d" % winner)
        exit()
The %d is a placeholder that gets replaced with the winner's number. exit() stops the whole program.
Step 4: Get Player Input and Place the Chip
We ask the player for a column, then find the lowest empty row and place the chip there:
    input_text = input("Enter your move player %d: " % player)
    if not str.isnumeric(input_text):
        continue
    i = int(input_text)
    if i == 0:
        exit()
    if i > 6:
        continue
    if world[0][i - 1] > 0:
        continue

    # Find the lowest empty row in this column
    for y in range(5, -1, -1):
        if world[y][i - 1] == 0:
            world[y][i - 1] = player
            break
There's a lot of checking here! We make sure:
- The input is actually a number (
str.isnumeric) - Entering
0quits the game - The column isn't bigger than 6
- The column isn't already full (
world[0][i - 1] > 0checks the top cell)
Then we scan from the bottom row up (range(5, -1, -1)) to find the first empty spot and place the chip there.
Step 5: Check for a Winner
After a chip lands, we scan the whole board:
    for y in range(6):
            for x in range(6):
                if world[y][x] != player:
                    continue
                # horizontal
                if x <= 2 and world[y][x + 1] == player and world[y][x + 2] == player and world[y][x + 3] == player:
                    winner = player
                # vertical
                if y <= 2 and world[y + 1][x] == player and world[y + 2][x] == player and world[y + 3][x] == player:
                    winner = player
                # diagonal down-right
                if x <= 2 and y <= 2 and world[y + 1][x + 1] == player and world[y + 2][x + 2] == player and world[y + 3][x + 3] == player:
                    winner = player
                # diagonal up-right
                if x <= 2 and y > 2 and world[y - 1][x + 1] == player and world[y - 2][x + 2] == player and world[y - 3][x + 3] == player:
                    winner = player
The x <= 2 and y <= 2 checks stop us from looking off the edge of the board. For example, if x is 4, there aren't three more cells to the right, so we don't check horizontal.
Step 6: Check for Draw and Switch Players
    if world[0][0] > 0 and world[0][1] > 0 and world[0][2] > 0 and world[0][3] > 0 and world[0][4] > 0 and world[0][5] > 0:
        winner = -1

    if player == 1:
        player = 2
    else:
        player = 1
If every cell in the top row is taken, the board is full -- it's a draw (we set winner to -1). Then we swap who's playing next.
The Full Code
You can see the complete file in [connect4.py](connect4.py). It puts all of the steps above together into one file.
Run It!
First, make sure you have numpy installed. Open your terminal and run:
pip3 install numpyThen save your file (Cmd+S) and run it:
python3 connect4.pyEnter column numbers (1-6) to drop chips. Enter 0 to quit.
1. Change the board size -- Try making it numpy.zeros((8, 8)) and update the column numbers and range checks. Can you make a bigger board work? 2. Change the win condition -- What if you only needed 3 in a row instead of 4? (Hint: remove one of the checks in each direction.) 3. Change the player symbols -- Right now players are 1.0 and 2.0. Can you think of a way to show something different?
Add a move counter that shows how many total moves have been made. Print it next to the board each turn. (Hint: create a variable, add 1 to it each time a chip lands.)
Cleaning Up
Refactor our Connect 4 game by organizing the messy code into clean, reusable functions.
So remember the Connect 4 code from last lesson? It works, but it's one giant while True: loop with everything jammed together. Imagine you wanted to change how the board draws, or fix a bug in the win checker -- you'd have to hunt through the whole file to find the right lines. It's like having all your clothes, books, and games in one huge pile on the floor. It works (you can find stuff eventually), but it's a mess.
We're going to fix that by learning about functions.
What Are Functions?
You've actually been using functions this whole time! Every time you wrote print("hello") or input("Enter your name: "), you were calling a function. Someone else wrote the code for print and input — you just use them by name.
But here's the cool part: you can write your own functions too. A function is a named block of code that groups a series of statements together, so you can run them whenever you want just by calling the name. Think of it like a recipe card — instead of repeating every step every time, you just say "follow the pancake recipe" and all the steps happen.
Functions can also take parameters — values you pass in between the parentheses. When you write print("hello"), the text "hello" is a parameter. Your own functions work the same way.
In Python, you create a function with the def keyword:
def say_hello():
    print("Hello!")
Now whenever you write say_hello(), Python runs that code. The parentheses () are important — they tell Python "run this function."
You can add parameters too:
def say_hello(name):
    print(f"Hello, {name}!")

say_hello("Robert")  # prints: Hello, Robert!
Functions Can Return Things
Some functions do their job and then hand something back to you. That's called a return value.
def add(a, b):
    return a + b

result = add(3, 4)  # result is now 7
The return keyword sends a value back to wherever the function was called. It's like asking someone a question -- the return value is their answer.
The global Keyword
Here's something a little weird. Variables you create outside a function are called global variables. Functions can read them just fine, but if a function wants to change a global variable, you have to tell Python that's what you mean by using the global keyword:
score = 0

def add_point():
    global score
    score = score + 1
Without global score, Python would think you're trying to create a brand new variable called score inside the function, and it would get confused.
Fair warning: using global a lot isn't great practice. In a later lesson, we'll learn about classes, which are a much cleaner way to share data. But for now, global gets the job done.
Professional programmers almost never use global variables. Instead, they use techniques like classes (which you'll learn soon!) or pass data through function parameters. But global is a great starting point for understanding how data flows between functions.
The Plan
We're going to take the big messy loop from Lesson 13 and break it into five functions:
| Function | Job | |---|---| | draw_world() | Clear screen, print the board, check game over | | get_input() | Ask the player for a column, return it | | check_winner() | Scan the board for four in a row | | switch() | Swap from player 1 to player 2 (or back) | | animate_chip() | Move the chip down one row |
A good function does one thing and has a name that describes what it does. If you can't describe what a function does in one sentence, it's probably doing too much and should be split up.
After this, our main loop will read almost like English:
while True:
    draw_world()
    if not chip_falling:
        i = get_input()
        ...
    else:
        animate_chip()
        ...
    if not chip_falling:
        check_winner()
        switch()
That's so much easier to understand. You can look at the main loop and immediately know what's going on without reading every single line of code.
Step-by-Step Build
Step 1: Same Setup as Before
The imports and variables stay the same:
import os
import numpy
import time

world = numpy.zeros((6, 6))
player = 1
winner = 0
chip_falling = False
chip_falling_ypos = 0
Step 2: The draw_world() Function
We pull out all the drawing code into its own function:
def draw_world():
    os.system('clear')
    print("  1  2  3  4  5  6")
    print("---------------------")
    print(world)
    if winner < 0:
        print("DRAW")
        exit()
    elif winner > 0:
        print("WINNER - PLAYER: %d" % winner)
        exit()
Notice that draw_world() can read world and winner without needing global -- it's only reading them, not changing them.
Step 3: The get_input() Function
This function asks for input and returns the column number. If the input is bad, it returns -1:
def get_input():
    input_text = input()
    if not str.isnumeric(input_text):
        return -1
    i = int(input_text)
    if i == 0:
        exit()
    if i > 6:
        return -1
    if world[0][i - 1] > 0:
        return -1
    return i
Returning -1 for bad input is a common trick. The main loop can check: if the result is negative, skip this turn.
Step 4: The check_winner() Function
This is the big win-checking code, now in its own function. It needs global winner because it might change the winner variable:
def check_winner():
    global winner
    for y in range(6):
        for x in range(6):
            if world[y][x] != player:
                continue
            if x <= 2 and world[y][x + 1] == player and world[y][x + 2] == player and world[y][x + 3] == player:
                winner = player
            if y <= 2 and world[y + 1][x] == player and world[y + 2][x] == player and world[y + 3][x] == player:
                winner = player
            if x <= 2 and y <= 2 and world[y + 1][x + 1] == player and world[y + 2][x + 2] == player and world[y + 3][x + 3] == player:
                winner = player
            if x <= 2 and y > 2 and world[y - 1][x + 1] == player and world[y - 2][x + 2] == player and world[y - 3][x + 3] == player:
                winner = player
    if world[0][0] > 0 and world[0][1] > 0 and world[0][2] > 0 and world[0][3] > 0 and world[0][4] > 0 and world[0][5] > 0:
        winner = -1
Step 5: The switch() Function
Short and sweet:
def switch():
    global player
    if player == 1:
        player = 2
    else:
        player = 1
Again, global player is needed because we're changing player.
Step 6: The animate_chip() Function
Moves the chip down one row:
def animate_chip():
    if chip_falling_ypos > 0:
        world[chip_falling_ypos - 1][i - 1] = 0
    world[chip_falling_ypos][i - 1] = player
This one modifies world directly through numpy indexing (assigning to specific cells), which works without global because we're changing the contents of world, not replacing the whole variable. Think of it like this: you're rearranging furniture inside a house, not replacing the house itself. Python only cares if you try to swap out the whole house.
Step 7: The Clean Main Loop
Now look how much nicer the main loop is:
while True:
    draw_world()
    if not chip_falling:
        i = get_input()
        if i < 0:
            continue
        chip_falling = True
        chip_falling_ypos = 0
    else:
        animate_chip()
        if chip_falling_ypos == 5 or world[chip_falling_ypos + 1][i - 1] > 0:
            chip_falling = False
        else:
            chip_falling_ypos = chip_falling_ypos + 1
            time.sleep(0.05)
    if not chip_falling:
        check_winner()
        switch()
You can read this and immediately understand the flow: draw, get input (or animate), check winner, switch. That's the power of functions.
The Full Code
Check out connect4.py next to this lesson for the complete, runnable file.
Run It!
Make sure numpy is installed (pip3 install numpy if you haven't already), then save your file (Cmd+S) and run:
python3 connect4.pyIt plays exactly the same as v1 -- but the code is way more organized. Same game, cleaner code.
1. Add a print inside a function -- Put print("Drawing the world!") at the top of draw_world(). See how it runs every time the function is called? 2. Make get_input() print the prompt -- Change it so get_input() also prints "Enter your move player X:" before calling input(). (Hint: you'll need to read the player variable.) 3. Create a new function -- Write a function called is_board_full() that returns True if the top row is full and False otherwise. Use it inside check_winner(). 4. Rename functions -- Try renaming switch() to next_player(). Make sure you change it everywhere it's called! 5. Comment the functions -- Add a comment at the top of each function explaining what it does. This is called documentation and it's a great habit.
Create a function called print_prompt() that prints "Enter your move player X:" (with the right player number) and call it from the main loop before get_input(). This separates the prompt from the input logic -- each function does one job.
The Game Loop
Understand the game loop -- the single most important concept in game programming. Every game ever made uses one, and after this lesson, you'll know exactly how it works.
The Heartbeat of Every Game
Right now, on your computer, Minecraft runs a loop about 20 times per second. Every single tick, it does the same three things: check what the player is doing (input), update the world (physics, mobs moving, blocks breaking), and draw everything on screen (render). Then it does it again. And again. Forever.
That's the game loop.
Every game you've ever played -- Zelda, Mario Kart, F1 games, Fortnite -- they ALL have this exact same structure at their core.
Here's the pattern:
while game_is_running:
    handle_input()    # What is the player doing?
    update_state()    # What changed in the world?
    draw_screen()     # Show everything on screen
    tick()            # Wait a tiny bit, then do it all again
That's it. Four steps, repeating forever. Let's break each one down.
1. Handle Input
This is where the game checks: what is the player doing right now?
- In Minecraft: did they press W to walk forward? Did they click to break a block?
- In Mario Kart: are they holding the accelerator? Did they press the drift button?
- In our demo below: did they press Escape to quit?
The game doesn't wait for you to do something. It just checks, really fast, every single frame. If you're not pressing anything, it moves on.
2. Update State
This is where the game figures out what changed since the last frame.
- In Minecraft: mobs move, gravity pulls falling blocks, crops grow, redstone circuits fire.
- In Fortnite: bullets travel, the storm circle shrinks, players take damage.
- In our demo: the ball moves a little bit and bounces off walls.
This is the "brain" of the game. All the rules and physics live here.
3. Draw Screen
This is where the game shows you everything.
It redraws the ENTIRE screen from scratch, every single frame. It doesn't move things around -- it erases everything and redraws it all in the new positions. This happens so fast (60+ times per second) that it looks like smooth motion.
Think of it like a flipbook. Each page is drawn fresh, but flip through them fast and you see animation.
4. Tick
The game waits just a tiny bit before doing it all again. This controls how fast the loop runs -- the frame rate.
Without this pause, the game would run as fast as your computer can go, which would be different on every machine. The tick keeps everything consistent.
Minecraft runs its game logic at 20 ticks per second. Most console and PC games target 60 frames per second. Competitive games like CS2 and Valorant run at 144+ fps because pro players need every millisecond of responsiveness. The higher the frame rate, the smoother everything feels.
Let's Build One
Time to see the game loop in action. We'll make the simplest possible visual demo: a ball bouncing around a window.
The game window uses a coordinate system — every pixel has an (x, y) position. x goes left to right, y goes top to bottom. Yes, y goes DOWN, not up like in math class. That's because screens draw from the top-left corner. When you write ball_y += speed, you're moving the ball downward. It feels backwards at first, but you'll get used to it — every game engine works this way.
- Input: press Escape to quit
- Update: move the ball, bounce off walls
- Draw: fill the screen, draw the ball
- Tick: control frame rate
Here's the complete code:
import pygame

pygame.init()
screen = pygame.display.set_mode((600, 400))
pygame.display.set_caption("Bouncing Ball")
clock = pygame.time.Clock()

# Ball state
x, y = 300, 200       # Starting position (center of window)
dx, dy = 4, 3         # Speed: 4 pixels right, 3 pixels down per frame

running = True
while running:
    # 1. INPUT -- check what the player is doing
    for event in pygame.event.get():
        if event.type == pygame.QUIT:
            running = False
        if event.type == pygame.KEYDOWN and event.key == pygame.K_ESCAPE:
            running = False

    # 2. UPDATE -- move the ball and bounce off walls
    x += dx
    y += dy
    if x <= 15 or x >= 585:   # Hit left or right wall
        dx = -dx
    if y <= 15 or y >= 385:   # Hit top or bottom wall
        dy = -dy

    # 3. DRAW -- clear screen and draw ball in new position
    screen.fill('Black')
    pygame.draw.circle(screen, 'Cyan', (x, y), 15)
    pygame.display.flip()

    # 4. TICK -- run at 60 frames per second
    clock.tick(60)

pygame.quit()
That's under 35 lines, and it's a complete game loop with real graphics. Every game you'll build from here follows this exact same pattern.
Run It!
Save the file and run:
python3 bouncing_ball.pyYou should see a cyan ball bouncing around a black window. Press Escape (or close the window) to quit.
1. Change the speed -- Try setting dx, dy = 8, 6. What happens? Try 1, 1 for slow motion. 2. Change the frame rate -- Change clock.tick(60) to clock.tick(10). Now try clock.tick(144). See how the frame rate changes the feel? 3. Add a second ball -- Create x2, y2, dx2, dy2 variables and draw a second circle with a different color. Each ball bounces independently! 4. Change the color on bounce -- Make the ball change color every time it hits a wall. (Hint: store the color in a variable and change it when you flip dx or dy.) 5. Make it leave a trail -- What happens if you remove the screen.fill('Black') line? The ball draws over itself without erasing!
Add keyboard controls: use the arrow keys to change the ball's direction while it's moving. You'll need to check for pygame.K_UP, pygame.K_DOWN, pygame.K_LEFT, and pygame.K_RIGHT in the input section and modify dx and dy accordingly.
Adding Graphics
Rebuild Connect 4 with real graphics using Pygame -- a window, colors, and circles instead of terminal text.
Why Pygame?
Up to now, our Connect 4 game runs in the terminal. It works, but it looks pretty plain -- just numbers in a grid. Wouldn't it be cooler to have an actual window with colored circles?
That's what Pygame does. It's a Python library that lets you create windows, draw shapes, play sounds, and handle keyboard/mouse input. Basically, it turns Python into a game engine.
This is similar to what Unreal Engine does for Fortnite or what Unity does for tons of indie games — they handle the graphics so the developer can focus on making the game fun.
Pygame was created in the year 2000 and is one of the most popular game libraries for Python. Thousands of games have been made with it, including some that have been sold on Steam!
Installing Pygame
Before we can use it, we need to install it. Open your terminal and run:
pip3 install pygameThat's it. Now you can import pygame in any Python file.
The Coordinate System
Here's something important that trips people up. In Pygame, the top-left corner of the window is position (0, 0). The x-axis goes right (like normal), but the y-axis goes DOWN, not up. So (100, 200) means 100 pixels to the right and 200 pixels down from the top-left.
Every frame, the game does position = position + speed. That's the fundamental equation of game physics. In F1 games, a car's position on the track updates by its speed every frame. If speed is 5 pixels per frame and you run at 60 FPS, the object moves 300 pixels per second. distance = speed × time — the same formula from physics class, running 60 times a second inside every game you've ever played.
Think of it like reading a book -- you start at the top-left and go right and down.
The y-axis going DOWN instead of UP trips up almost everyone at first. If your game object is moving the wrong direction vertically, check if you're adding when you should be subtracting (or vice versa).
The Game Loop
You know how in the terminal version, we used input() to pause and wait for the player? Pygame doesn't work that way. Instead, we have a game loop that runs over and over, super fast:
- Check for events (did someone press a key? click the X button?)
- Update the game state (place a chip, check for winner)
- Draw everything to the screen
- Flip the display (
pygame.display.update()) - Sleep a tiny bit (
time.sleep(0.1)) so we don't burn your CPU
This loop runs maybe 10 times per second. Every time through, it redraws the entire screen from scratch. Think of it like a flipbook -- each "page" is a complete picture, and flipping through them fast makes it look smooth.
Colors
Pygame understands color names like 'Red', 'Blue', 'Black', 'Yellow', and 'Green'. You can also use RGB tuples like (255, 0, 0) for red, but the names are easier to read.
Events Instead of input()
In the terminal, input() stopped everything and waited for you to type. In Pygame, the game loop keeps running and we check for events each time through. A keyboard press creates a pygame.KEYDOWN event, and we can read which key was pressed from event.unicode.
Back to Messy (On Purpose!)
You might notice this code is all jammed into one big loop again -- no functions. That's on purpose! We cleaned things up with functions in Lesson 14, but now we're learning a completely new library (Pygame), so we're keeping it simple. We'll add functions back later.
Step-by-Step Build
Step 1: Imports and Setup
import pygame
import time
import numpy

world = numpy.zeros((6, 6))
player = 1
winner = 0
Same grid and variables as before. Nothing new here.
Step 2: Initialize Pygame
pygame.init()
screen = pygame.display.set_mode((800, 400))
pygame.display.set_caption('Connect 4')
font = pygame.font.Font(None, 25)pygame.init()starts up Pygame's systemsset_mode((800, 400))creates a window that's 800 pixels wide and 400 tallset_caption()sets the text in the title barpygame.font.Font(None, 25)creates a font for drawing text (size 25, default font)
Step 3: The Main Loop -- Events
while True:
    i = 0
    for event in pygame.event.get():
        if event.type == pygame.QUIT:
            pygame.quit()
            exit()
        elif event.type == pygame.KEYDOWN:
            if event.key == pygame.K_ESCAPE:
                pygame.quit()
                exit()
            else:
                i = int(event.unicode)
Every frame, we check all events:
pygame.QUIThappens when someone clicks the X button on the windowpygame.KEYDOWNhappens when a key is pressed- Escape key quits the game
- Any other key -- we grab its character with
event.unicodeand convert to a number
Step 4: Place the Chip
    if i > 0 and winner == 0:
        for y in range(6):
            if y == 5 or world[y + 1][i - 1] > 0:
                world[y][i - 1] = player
                break
If the player pressed a number key and the game isn't over, we drop a chip. We scan from the top down and place it in the first row where either we hit the bottom (y == 5) or there's already a chip below.
No animation yet -- the chip just appears instantly. We'll add animation in the next lesson!
Step 5: Check for a Winner
        for y in range(6):
            for x in range(6):
                if world[y][x] != player:
                    continue
                if x <= 2 and world[y][x + 1] == player and world[y][x + 2] == player and world[y][x + 3] == player:
                    winner = player
                if y <= 2 and world[y + 1][x] == player and world[y + 2][x] == player and world[y + 3][x] == player:
                    winner = player
                if x <= 2 and y <= 2 and world[y + 1][x + 1] == player and world[y + 2][x + 2] == player and world[y + 3][x + 3] == player:
                    winner = player
                if x <= 2 and y > 2 and world[y - 1][x + 1] == player and world[y - 2][x + 2] == player and world[y - 3][x + 3] == player:
                    winner = player
Same win-checking logic as before -- horizontal, vertical, and both diagonals.
Step 6: Check for Draw and Switch Players
        if world[0][0] > 0 and world[0][1] > 0 and world[0][2] > 0 and world[0][3] > 0 and world[0][4] > 0 and world[0][5] > 0:
            winner = -1
        if player == 1:
            player = 2
        else:
            player = 1
Step 7: Draw Everything
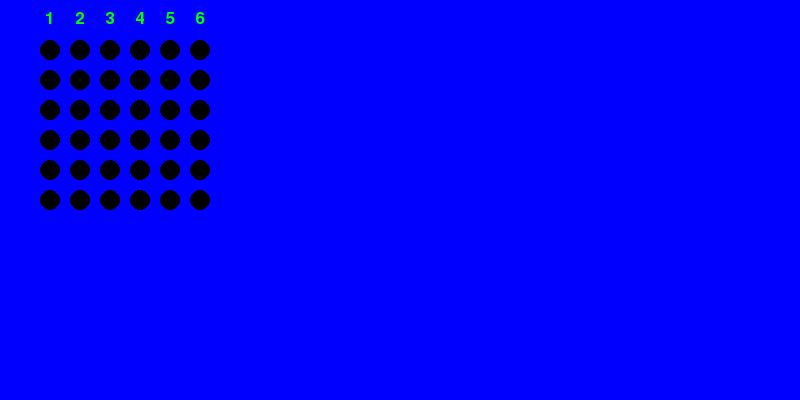
Now the fun part -- actually drawing the board!
    screen.fill('Blue')
    for x in range(6):
        text = font.render(str(x + 1), True, 'Green')
screen.blit(text, ((x * 30 + 45, 10)))screen.fill('Blue')paints the whole window blue (like a Connect 4 board)- We render column numbers (1-6) as green text across the top
font.render()turns text into an image, andscreen.blit()puts that image on screen
    for y in range(6):
        for x in range(6):
            if world[y][x] == 0:
                pygame.draw.circle(screen, 'Black', (x * 30 + 50, y * 30 + 50), 10)
            elif world[y][x] == 1:
                pygame.draw.circle(screen, 'Red', (x * 30 + 50, y * 30 + 50), 10)
            elif world[y][x] == 2:
                pygame.draw.circle(screen, 'Yellow', (x * 30 + 50, y * 30 + 50), 10)
For every cell on the grid, we draw a circle:
- Empty = black circle (looks like a hole)
- Player 1 = red circle
- Player 2 = yellow circle
The (x 30 + 50, y 30 + 50) figures out where each circle goes. The 10 at the end is the radius.
Step 8: Show Winner Text and Update Display
    if winner < 0:
        text = font.render('DRAW', True, 'Green')
        screen.blit(text, ((10, 350)))
    elif winner > 0:
        text = font.render("WINNER - PLAYER: %d" % winner, True, 'Green')
        screen.blit(text, ((10, 350)))
    pygame.display.update()
time.sleep(0.1)- If there's a winner or draw, show a message at the bottom
pygame.display.update()actually pushes everything to the screen (nothing shows until you call this!)time.sleep(0.1)waits a tenth of a second before the next loop
The Full Code
You can see the complete file in [connect4.py](connect4.py). It puts all the steps above together into one runnable file.
Run It!
- Make sure you have Pygame and numpy installed:
pip3 install pygame numpy- Run it:
python3 connect4.py- Press number keys 1-6 to drop chips. Press Escape or click the X to quit.
1. Change the window size -- Try pygame.display.set_mode((600, 600)). What happens? Does the board still fit? 2. Change the colors -- Swap 'Red' and 'Yellow' for other colors like 'Orange', 'Purple', or 'White'. Pick your favorites! 3. Make the circles bigger -- Change the radius from 10 to 15 or 20. You'll also need to adjust the spacing (the 30 in x * 30). 4. Change the background -- Try screen.fill('DarkGreen') or screen.fill((50, 50, 50)) for dark gray. The RGB tuple lets you pick any color! 5. Add a player indicator -- Before pygame.display.update(), render some text that says whose turn it is, like "Player 1's turn".
Add a restart feature. When someone wins (or it's a draw), if the player presses the R key, reset world to all zeros, set winner = 0, and set player = 1. Now you can play again without restarting the program! Hint: check for event.key == pygame.K_r in your event loop.
Dropping Chips
Make chips fall down the board one row at a time, like a real Connect 4 game.

Watch the chips fall into place!
What's Wrong with the Old Version?
In the last lesson, chips just appeared in place -- poof! That works, but it doesn't look like a real Connect 4 game. In the real game, you drop a chip in the top and it falls down to the bottom. Let's make that happen.
Thinking in Frames
You know how our game loop runs over and over? Each time through is one frame, like one frame in a movie. Right now our loop runs about 10 times per second. If we want a chip to fall, we don't move it all the way down at once. Instead, we move it one row per frame.
Frame 1: chip is at row 0 Frame 2: chip is at row 1 Frame 3: chip is at row 2 ...and so on until it hits the bottom or another chip.
This is how ALL animation works in games -- small movements, many times per second, that look smooth when you watch them.
If your animation looks choppy, try increasing the frame rate (smaller time.sleep value). If it's too fast to see, slow it down. Finding the right speed is all about experimenting!
State Variables
To make the animation work, we need to remember some things between frames:
chip_falling-- is a chip currently dropping? (TrueorFalse)chip_x-- which column is it falling in?chip_y-- which row is it currently at?
These are called state variables because they track the state of the animation. Think of it like a bookmark -- they remember where we are in the middle of the falling process.
Frame Rate
We'll change time.sleep(0.1) to time.sleep(1/20). That means our game runs at 20 frames per second (FPS). 1/20 is 0.05 seconds per frame. This makes the animation smoother and the chip falls at a nice speed.
Most movies run at 24 frames per second, TV shows at 30 FPS, and modern games at 60 FPS or higher. The human eye can notice the difference up to about 120 FPS!
The Tricky Part
The animation code needs to be careful about order. Here's what happens each frame when a chip is falling:
- Place the chip at its current position on the grid
- Erase it from the position above (so it doesn't leave a trail)
- Check if it's landed (hit the bottom or another chip)
- If it landed, check for a winner and switch players
- If not, move it down one row for the next frame
The key insight: we only check for the winner and process player input after the chip finishes falling. While it's falling, we ignore new key presses.
Step-by-Step Build
Step 1: Setup
Almost the same as before, but we add chip_falling and change the window size:
import pygame
import time
import numpy

world = numpy.zeros((6, 6))
player = 1
winner = 0

pygame.init()
screen = pygame.display.set_mode((400, 400))
pygame.display.set_caption('Connect 4')
font = pygame.font.Font(None, 25)
chip_falling = False
Step 2: Event Handling
while True:
    i = 0
    for event in pygame.event.get():
        if event.type == pygame.QUIT:
            pygame.quit()
            exit()
        elif event.type == pygame.KEYDOWN:
            if event.key == pygame.K_ESCAPE:
                pygame.quit()
                exit()
            else:
                if event.unicode.isnumeric():
                    i = int(event.unicode)
                    chip_x = i - 1
Notice something new here: event.unicode.isnumeric(). This checks if the key pressed is actually a number before we try to convert it. Without this, pressing a letter key would crash the program! We also save chip_x (the column, zero-indexed) right away.
Step 3: The Animation Logic
This is the big new piece. If a chip is currently falling, we handle it:
    if chip_falling:
        world[chip_y][chip_x] = player
        if chip_y > 0:
            world[chip_y - 1][chip_x] = 0
First, we place the chip at its current row (chip_y). Then we erase it from the row above -- but only if it's not at row 0 (because there's no row -1!).
        if chip_y == 5 or world[chip_y + 1][chip_x] > 0:
            chip_falling = False
Has it landed? It's landed if we're at the bottom row (5) or if there's already a chip in the row below.
            for y in range(6):
                for x in range(6):
                    if world[y][x] != player:
                        continue
                    if x <= 2 and world[y][x + 1] == player and world[y][x + 2] == player and world[y][x + 3] == player:
                        winner = player
                    if y <= 2 and world[y + 1][x] == player and world[y + 2][x] == player and world[y + 3][x] == player:
                        winner = player
                    if x <= 2 and y <= 2 and world[y + 1][x + 1] == player and world[y + 2][x + 2] == player and world[y + 3][x + 3] == player:
                        winner = player
                    if x <= 2 and y > 2 and world[y - 1][x + 1] == player and world[y - 2][x + 2] == player and world[y - 3][x + 3] == player:
                        winner = player
Only when the chip has landed do we check for a winner. Same four-direction check as before.
            if world[0][0] > 0 and world[0][1] > 0 and world[0][2] > 0 and world[0][3] > 0 and world[0][4] > 0 and world[0][5] > 0:
                winner = -1
            if player == 1:
                player = 2
            else:
                player = 1
        chip_y = chip_y + 1
After landing, check for draw and switch players. Then move chip_y down by 1 for the next frame (this only matters if the chip is still falling).
Step 4: Start a New Chip Falling
    if i > 0 and winner == 0:
        chip_falling = True
        chip_y = 0
If the player pressed a number and the game isn't over, start a new chip at the top. Notice this comes after the animation code -- that way the chip starts at row 0 and the animation picks it up on the next frame.
Step 5: Drawing (Same as Before)
    screen.fill('Blue')
    for x in range(6):
        text = font.render(str(x + 1), True, 'Green')
        screen.blit(text, ((x * 30 + 45, 10)))
    for y in range(6):
        for x in range(6):
            if world[y][x] == 0:
                pygame.draw.circle(screen, 'Black', (x * 30 + 50, y * 30 + 50), 10)
            elif world[y][x] == 1:
                pygame.draw.circle(screen, 'Red', (x * 30 + 50, y * 30 + 50), 10)
            elif world[y][x] == 2:
                pygame.draw.circle(screen, 'Yellow', (x * 30 + 50, y * 30 + 50), 10)
    if winner < 0:
        text = font.render('DRAW', True, 'Green')
        screen.blit(text, ((10, 350)))
    elif winner > 0:
        text = font.render("WINNER - PLAYER: %d" % winner, True, 'Green')
        screen.blit(text, ((10, 350)))
    pygame.display.update()
    time.sleep(1 / 20)
The drawing code is exactly the same. The magic is that because world gets updated each frame with the chip in a new position, the circle appears to fall when we redraw.
The Full Code
You can see the complete file in [connect4.py](connect4.py).
Run It!
- Make sure you have Pygame and numpy installed:
pip3 install pygame numpy- Run it:
python3 connect4.py- Press 1-6 to drop chips and watch them fall!
1. Slow-motion mode -- Change time.sleep(1 / 20) to time.sleep(0.5). Now the chip falls in slow motion -- you can see each step clearly. 2. Speed mode -- Change it to time.sleep(1 / 60). Super fast! This is 60 FPS, which is what most real games run at. 3. Change the window size -- Make it (400, 400) or (600, 600). See how the board looks at different sizes. 4. Add a falling sound -- This is tricky but fun. Look up pygame.mixer.Sound and play a short sound each time chip_falling is set to True. 5. Trail effect -- What happens if you comment out the line world[chip_y - 1][chip_x] = 0? The chip leaves a trail as it falls!
Right now, you can drop a chip into a full column and it just overwrites what's there. Add a check: if world[0][chip_x] is already taken (greater than 0), don't start the chip falling. This prevents stacking chips on a full column.
The Final Version
Clean up our Pygame Connect 4 by organizing the code into functions -- the same trick we used in Lesson 14, but now with graphics.
By the end of this section, you'll be building a playable game just like this one. Click a column or press 1-6 to drop a chip!
Here We Go Again
Remember Lesson 6? We took the messy terminal Connect 4 and broke it into functions like draw_world(), get_input(), and check_winner(). The code got way easier to read.
Then in Lessons 15 and 16, we switched to Pygame and things got messy again. All the event handling, animation, drawing, and win-checking are tangled together in one giant loop. Sound familiar?
This is the second time you've felt the pain of messy code. And this time, you already know the fix: functions.
The Plan
We're going to split our code into five functions:
| Function | What it does | |---|---| | draw_world() | Fills the screen, draws all circles and text | | get_input() | Checks Pygame events, returns which key was pressed | | check_winner() | Scans the board for four in a row | | switch() | Swaps between player 1 and player 2 | | animate_chip() | Moves the falling chip down one row |
After this, our main loop will be super short and easy to read:
while True:
    i = get_input()
    # start chip falling if needed
    if chip_falling:
        animate_chip()
        # check if landed
    draw_world()
    time.sleep(0.1)
See how clean that is? You can read it like English.
The global Keyword
Here's one tricky thing with functions in Python. When you create a variable outside a function (like winner = 0), the function can read it just fine. But if you want the function to change it, you need to use the global keyword.
winner = 0

def check_winner():
    global winner    # "I want to change the REAL winner, not make a new one"
    winner = player
Without global, Python would create a brand-new winner variable that only lives inside the function, and the real one would never change. Think of it like the difference between writing on the class whiteboard (global) vs. writing on a sticky note that you throw away (local).
You don't need global to read a variable or to modify something inside a list or array (like world[y][x] = player). You only need it when you're assigning a completely new value to the variable with =.
Forgetting global inside a function that changes a variable is a sneaky bug. Python won't give you an error -- it'll just create a new local variable with the same name, and your changes will vanish when the function ends.
Why This Matters
Right now, Connect 4 is maybe 80 lines of code. That's manageable. But the Snake game we're building next will be bigger, and the dungeon game after that will be even bigger. If you don't organize your code into functions, you'll spend more time finding code than writing code.
Think of it like labeled drawers in a toolbox. You don't dump all your tools in one pile -- you sort them so you can find what you need.
When your main loop reads like English -- get_input(), animate_chip(), check_winner(), draw_world() -- you know your code is well organized. If you can't tell what the main loop does at a glance, your functions probably need better names.
Step-by-Step Build
Step 1: Imports and Global Variables
import pygame
import time
import numpy

world = numpy.zeros((6, 6))
player = 1
winner = 0
chip_falling = False
chip_falling_xpos = 0
chip_falling_ypos = 0

pygame.init()
screen = pygame.display.set_mode((800, 400))
pygame.display.set_caption('Connect 4')
font = pygame.font.Font(None, 25)
All the variables live at the top, outside any function. We renamed chip_x and chip_y to chip_falling_xpos and chip_falling_ypos to make them clearer.
Step 2: The draw_world() Function
def draw_world():
    screen.fill('Blue')
    for x in range(6):
        text = font.render(str(x + 1), True, 'Green')
        screen.blit(text, ((x * 30 + 45, 10)))
    for y in range(6):
        for x in range(6):
            if world[y][x] == 0:
                pygame.draw.circle(screen, 'Black', (x * 30 + 50, y * 30 + 50), 10)
            elif world[y][x] == 1:
                pygame.draw.circle(screen, 'Red', (x * 30 + 50, y * 30 + 50), 10)
            elif world[y][x] == 2:
                pygame.draw.circle(screen, 'Yellow', (x * 30 + 50, y * 30 + 50), 10)
    if winner < 0:
        text = font.render('DRAW', True, 'Green')
        screen.blit(text, ((10, 350)))
    elif winner > 0:
        text = font.render("WINNER - PLAYER: %d" % winner, True, 'Green')
        screen.blit(text, ((10, 350)))
    pygame.display.update()
This is exactly the same drawing code as before -- we just wrapped it in a function. Now instead of 15 lines in the main loop, we just call draw_world(). Notice we don't need global here because we're only reading world, winner, screen, and font -- not changing them.
Step 3: The get_input() Function
def get_input():
    for event in pygame.event.get():
        if event.type == pygame.QUIT:
            pygame.quit()
            exit()
        elif event.type == pygame.KEYDOWN:
            if event.key == pygame.K_ESCAPE:
                pygame.quit()
                exit()
            else:
                return int(event.unicode)
    return 0
This function checks all events and returns the key that was pressed (as a number). If no key was pressed, it returns 0. The main loop can just say i = get_input() and it either gets a column number or 0.
Step 4: The check_winner() Function
def check_winner():
    global winner
    for y in range(6):
        for x in range(6):
            if world[y][x] != player:
                continue
            if x <= 2 and world[y][x + 1] == player and world[y][x + 2] == player and world[y][x + 3] == player:
                winner = player
            if y <= 2 and world[y + 1][x] == player and world[y + 2][x] == player and world[y + 3][x] == player:
                winner = player
            if x <= 2 and y <= 2 and world[y + 1][x + 1] == player and world[y + 2][x + 2] == player and world[y + 3][x + 3] == player:
                winner = player
            if x <= 2 and y > 2 and world[y - 1][x + 1] == player and world[y - 2][x + 2] == player and world[y - 3][x + 3] == player:
                winner = player
    if world[0][0] > 0 and world[0][1] > 0 and world[0][2] > 0 and world[0][3] > 0 and world[0][4] > 0 and world[0][5] > 0:
        winner = -1
Here we DO need global winner because we're assigning to it with winner = player. Without that line, Python would think we're creating a local variable and the real winner would stay at 0 forever.
Step 5: The switch() Function
def switch():
    global player
    if player == 1:
        player = 2
    else:
        player = 1
Short and sweet. Needs global player because it changes player.
Step 6: The animate_chip() Function
def animate_chip():
    if chip_falling_ypos > 0:
        world[chip_falling_ypos - 1][chip_falling_xpos - 1] = 0
    world[chip_falling_ypos][chip_falling_xpos - 1] = player
This erases the chip from its old position and places it in the new one. Notice we DON'T need global for world -- we're modifying what's inside the array, not replacing the array itself.
Step 7: The Main Loop
Here's the payoff -- look how clean this is:
while True:
    i = get_input()
    if not chip_falling and i > 0 and winner == 0:
        chip_falling = True
        chip_falling_xpos = i
        chip_falling_ypos = 0
    if chip_falling:
        animate_chip()
        if chip_falling_ypos == 5 or world[chip_falling_ypos + 1][chip_falling_xpos - 1] > 0:
            chip_falling = False
            check_winner()
            switch()
        else:
            chip_falling_ypos = chip_falling_ypos + 1
    draw_world()
    time.sleep(0.1)
That's the ENTIRE main loop. Compare this to the 50+ lines we had before. You can read it top to bottom and understand what the game does:
- Get input
- If someone pressed a key, start a chip falling
- If a chip is falling, animate it
- If it landed, check for winner and switch players
- Draw the board
- Wait a bit
The Full Code
You can see the complete file in [connect4.py](connect4.py).
Run It!
- Make sure you have Pygame and numpy installed:
pip3 install pygame numpy- Run it:
python3 connect4.py- It looks and plays the same as the last version -- but the code is SO much cleaner.
1. Add a reset_game() function -- Write a function that sets world back to zeros, winner to 0, and player to 1. Call it when someone presses R after the game ends. 2. Change draw_world() to use rectangles -- Replace pygame.draw.circle() with pygame.draw.rect(). A rect takes a position AND a size: pygame.draw.rect(screen, 'Red', (x, y, width, height)). 3. Add a draw_status() function -- Pull the winner/draw text into its own function. Now draw_world() only draws the board, and draw_status() handles the text. 4. Make check_winner() return True/False -- Instead of using global, have it return True if someone won. The main loop checks the return value. 5. Add a move counter -- Create a moves variable, increment it in switch(), and display it in draw_world().
Add a column highlight. Track which column the mouse is hovering over (look up pygame.mouse.get_pos()) and draw that column's circles slightly brighter or with a different border. You'll want to do this inside draw_world().
Snake Game
Build a fully playable Snake game with Pygame -- movement, apples, growing, collision, score, and game over.
By the end of this section, you'll be building a playable game just like this one. Use arrow keys to move (or swipe on mobile). Press Space to restart!
Tuples: Coordinates in a Pair
You know how a position on a grid always has two numbers -- an x and a y? Python has a special thing called a tuple that's perfect for that. It looks like a list, but with parentheses instead of square brackets:
position = (3, 7)That's an (x, y) pair. You get the pieces out with position[0] (the x) and position[1] (the y).
So why not just use a list? Think of it like this: a coordinate is always exactly two numbers. You'd never want to .append() a third number to a coordinate -- that doesn't even make sense. A tuple is Python's way of saying "these things go together as a unit, and that's that." Python also handles tuples a little more efficiently behind the scenes.
The Snake Is a List of Tuples
Here's where it gets cool. The snake's body is a list of tuples:
snake = [(3, 2), (2, 2), (1, 2), (0, 2)]Each tuple is one segment's position. The first one in the list is the head. When the snake moves, we stick a new head at the front and chop off the tail at the back. When it eats an apple, we skip the chop -- so the snake grows by one!
The original Snake game was created in 1976 for arcade machines. It became hugely famous when Nokia put it on their phones in 1998. Over 400 million people have played Snake on a Nokia phone!
Movement and Direction
We keep a snake_direction variable that's one of 'up', 'down', 'left', or 'right'. Each frame, we look at the head's position and figure out the new head position based on the direction.
One important rule: the snake can't do a 180-degree turn. If you're going right, pressing left would make you crash into yourself instantly. So we block opposite-direction changes.
Collision Detection
Two things end the game:
- Wall collision -- the new head is outside the grid bounds
- Self collision -- the new head lands on a segment that's already part of the snake's body
How does the game know when the snake hits a wall? It checks: if x < 0 or x >= width. That's a bounding box check — is this point inside this rectangle? Every game uses this. In Mario, the game checks if Mario's rectangle overlaps with a Goomba's rectangle. In F1 games, it checks if your car's box overlaps with the barrier's box. Simple math, used billions of times per second across every game in the world.
We check both before actually adding the new head to the snake.
Step-by-Step Build
Step 1: Imports and Variables
We need three libraries, plus some starting variables:
import pygame
import time
import random

snake = [(0, 0)]
snake_direction = 'right'
apple_position = None
game_over = False
The snake starts as a single segment at (0, 0) -- the top-left corner. The apple starts as None because we'll place it randomly once the game starts.
Step 2: Set Up Pygame
pygame.init()
font = pygame.font.Font(None, 25)
screen = pygame.display.set_mode((800, 400))
pygame.display.set_caption('Snake')
We've done this before in Connect 4. The window is 800 by 400 pixels. We also create a font for the score text.
Step 3: The Main Loop and Input
while True:
    for event in pygame.event.get():
        if event.type == pygame.QUIT:
            pygame.quit()
            exit()
        elif event.type == pygame.KEYDOWN:
            if event.key == pygame.K_ESCAPE:
                pygame.quit()
                exit()
            elif event.key == pygame.K_SPACE:
                snake = [(0, 0)]
                snake_direction = 'right'
                apple_position = None
                game_over = False
            elif event.key == pygame.K_UP:
                if snake_direction != 'down':
                    snake_direction = 'up'
            elif event.key == pygame.K_DOWN:
                if snake_direction != 'up':
                    snake_direction = 'down'
            elif event.key == pygame.K_LEFT:
                if snake_direction != 'right':
                    snake_direction = 'left'
            elif event.key == pygame.K_RIGHT:
                if snake_direction != 'left':
                    snake_direction = 'right'
Notice the 180-degree turn prevention. If you're going 'down', pressing up does nothing. If you're going 'right', pressing left does nothing. Each direction blocks its opposite.
Blocking 180-degree turns is a classic game design pattern. Without it, the snake would instantly crash into itself when you press the opposite direction. Always think about what happens when a player mashes buttons!
Pressing Space resets the whole game -- it puts the snake back at (0, 0), resets the direction, removes the apple, and clears the game over flag.
Step 4: Spawn the Apple
    if not apple_position:
        apple_position = (random.randint(0, 19), random.randint(0, 14))
If there's no apple on the board (because the game just started or the snake ate it), we pick a random position. The grid is 20 cells wide and 15 cells tall, so x goes from 0 to 19 and y goes from 0 to 14.
Step 5: Move the Snake
This is the heart of the game:
    if not game_over:
        last_snake_position = snake[0]
        new_snake_position = None
        if snake_direction == 'up':
            new_snake_position = (last_snake_position[0], last_snake_position[1] - 1)
        elif snake_direction == 'down':
            new_snake_position = (last_snake_position[0], last_snake_position[1] + 1)
        elif snake_direction == 'left':
            new_snake_position = (last_snake_position[0] - 1, last_snake_position[1])
        elif snake_direction == 'right':
            new_snake_position = (last_snake_position[0] + 1, last_snake_position[1])
We take the current head position (snake[0]) and create a new position one step in the current direction. Up means y gets smaller (remember, y=0 is the top of the screen). Down means y gets bigger.
Step 6: Check for Collisions
        if new_snake_position[0] < 0 or new_snake_position[0] >= 20 or new_snake_position[1] < 0 or new_snake_position[1] >= 15:
            game_over = True
        for i in snake:
            if new_snake_position == i:
                game_over = True
First we check walls: if the new head would be outside the grid (x less than 0, x 20 or more, y less than 0, y 15 or more), it's game over.
Then we check self-collision: we loop through every segment in the snake's body. If the new head would land on any of them, game over.
Step 7: Grow or Move
        if not game_over:
            snake.insert(0, new_snake_position)
        if new_snake_position == apple_position:
            apple_position = None
        elif not game_over:
            snake.pop()
If the game isn't over, we insert the new head at position 0 (the front of the list).
Then: if the new head is on the apple, we set apple_position = None so a new apple spawns next frame -- and we don't pop the tail, so the snake grows by one segment.
If the head isn't on the apple (and the game isn't over), we pop() the last element off the list. That's the tail disappearing -- so the snake stays the same length and appears to move forward.
Step 8: Draw Everything
    screen.fill('Blue')
    for x in range(20):
        for y in range(15):
            pygame.draw.rect(screen, 'Black', (x * 21 + 25, y * 21 + 25, 20, 20))
    if apple_position:
        pygame.draw.rect(screen, 'Red', (apple_position[0] * 21 + 25, apple_position[1] * 21 + 25, 20, 20))
    for t in snake:
        pygame.draw.rect(screen, 'Yellow', (t[0] * 21 + 25, t[1] * 21 + 25, 20, 20))
First we fill the background blue. Then we draw a 20x15 grid of black squares -- each one is 20 pixels with a 1-pixel gap (that's why we multiply by 21 instead of 20). The + 25 adds a margin around the edges.
Then we draw the apple as a red square and each snake segment as a yellow square, using the same grid math.
Step 9: Score and Game Over Text
    score_text = font.render("SCORE: %d" % len(snake), True, 'Green')
    screen.blit(score_text, ((500, 25)))
    if game_over:
        game_over_text = font.render("GAME OVER", True, 'Green')
        screen.blit(game_over_text, ((25, 360)))
    pygame.display.update()
    time.sleep(1 / 10)
The score is just the length of the snake list. We render text to an image, then blit (paste) it onto the screen. If the game is over, we also show "GAME OVER" at the bottom.
time.sleep(1 / 10) makes the game run at about 10 frames per second -- that's the snake's speed.
The Full Code
You can see the complete file in [snake.py](snake.py). It puts all of the steps above together into one file.
Run It!
pip3 install pygame
python3 snake.py
Use the arrow keys to steer the snake. Eat red apples to grow. Don't hit the walls or yourself! Press Space to restart after game over. Press Escape to quit.
Experiments
- Change the speed -- Try
time.sleep(1 / 5)for a slower game ortime.sleep(1 / 20)for a faster one. What feels best?
- Make a bigger grid -- Change the 20 and 15 to bigger numbers (and update the
randintranges and bounds checks to match). Can you fill the whole window?
- Change the colors -- Make the snake green, the apple yellow, and the background dark gray. Look up Pygame color names or use
(r, g, b)tuples like(255, 128, 0)for orange.
- Start the snake longer -- Change the starting snake to
[(2, 0), (1, 0), (0, 0)]so it starts with three segments. Does the game feel different?
- Remove wall death -- Instead of game over when hitting a wall, make the snake wrap around to the other side. (Hint: use
%-- the modulo operator -- on the coordinates.)
Challenge
Add a high score that persists across restarts. Create a high_score variable that starts at 0. When the game ends, if len(snake) is higher than high_score, update it. Display the high score next to the regular score. (It won't save when you close the program -- that's fine for now.)
Classes
Rebuild Snake using classes to organize the code like a real game developer would.
Why Classes?
Look at the Snake code from last lesson. The snake's data (snake, snake_direction) and the snake's behavior (movement, collision checking, drawing) are scattered all over the place. The apple's stuff is mixed in too. It works, but it's messy.
What if we could bundle the snake's data and its behavior into one neat package? That's exactly what a class does.
Think of it like this: a class is a blueprint. If you had a blueprint for "Snake," it would say "a Snake has a body and a direction, and it can move, draw itself, and change direction." Then you can build an actual snake from that blueprint -- that's called an object.
In Minecraft, every Creeper is an object built from the same Creeper class. Each one has its own position and health, but they all share the same behavior: walk toward player, hiss, explode. One blueprint, thousands of creepers.
The self Keyword
Here's the part that confuses everyone at first. When you write a method (a function inside a class), the first parameter is always self. It means "the object I'm talking about."
class Snake:
    def __init__(self):
        self.body = [(0, 0)]
        self.direction = 'right'
self.body means "MY body" -- the body that belongs to THIS particular snake. self.direction means "MY direction." If you had two snakes, each one would have its own self.body and self.direction.
__init__() -- The Constructor
__init__() is a special method that runs automatically when you create a new object. It's where you set up the starting values. The double underscores are Python's way of saying "this is special."
my_snake = Snake() # This calls __init__() automatically!When you write Snake(), Python creates a new Snake object and immediately calls __init__() on it. You don't call __init__() yourself -- Python handles it.
Methods -- Functions That Belong to an Object
A method is just a function that lives inside a class. The difference from a regular function is that it always gets self as the first parameter, so it can access the object's data.
class Snake:
    def score(self):
        return len(self.body) - 1
You call it like this:
my_snake = Snake()
print(my_snake.score())  # prints 0 (body has 1 segment, minus 1)
Notice you don't pass self when calling -- Python fills that in for you. You just write my_snake.score() and Python knows that self is my_snake.
The Three Classes
We'll split our game into three classes:
Snake-- has a body and direction. Can draw itself, update its position, change direction, and report its score.Apple-- has a position. Can regenerate in a random spot and draw itself.World-- has the screen, font, snake, apple, and game state. Handles input, updates everything, and draws the whole scene.
The World is the boss -- it owns a Snake and an Apple and coordinates everything.
Step-by-Step Build
Step 1: Imports
Same three libraries as before:
import pygame
import time
import random
Step 2: The Snake Class
class Snake:
    def __init__(self):
        self.body = [(0, 0)]
        self.direction = 'right'
Instead of two separate variables floating around, the snake's data lives right here inside the class. Clean!
Now the draw method:
    def draw(self, screen):
        for i in self.body:
            pygame.draw.rect(screen, 'Yellow', (i[0] * 21 + 25, i[1] * 21 + 25, 20, 20))
The snake knows how to draw itself. We pass in the screen so it knows where to draw. It loops through self.body and draws a yellow square for each segment.
The update method handles movement and collision:
    def update(self, apple):
        last_snake_position = self.body[0]
        new_snake_position = None
        if self.direction == 'up':
            new_snake_position = (last_snake_position[0], last_snake_position[1] - 1)
        elif self.direction == 'down':
            new_snake_position = (last_snake_position[0], last_snake_position[1] + 1)
        elif self.direction == 'left':
            new_snake_position = (last_snake_position[0] - 1, last_snake_position[1])
        elif self.direction == 'right':
            new_snake_position = (last_snake_position[0] + 1, last_snake_position[1])
        if new_snake_position[0] < 0 or new_snake_position[0] >= 20 or new_snake_position[1] < 0 or new_snake_position[1] >= 15:
            return True
        for i in self.body:
            if new_snake_position == i:
                return True
        self.body.insert(0, new_snake_position)
        if new_snake_position == apple.position:
            apple.regen()
        else:
            self.body.pop()
        return False
This is the same logic as before, but now it returns True if the snake died and False if it's still alive. Notice how it directly tells the apple to regen() when it gets eaten -- objects talking to each other!
The direction-changing method:
    def change_direction(self, key):
        if key == pygame.K_UP:
            if self.direction != 'down':
                self.direction = 'up'
        elif key == pygame.K_DOWN:
            if self.direction != 'up':
                self.direction = 'down'
        elif key == pygame.K_LEFT:
            if self.direction != 'right':
                self.direction = 'left'
        elif key == pygame.K_RIGHT:
            if self.direction != 'left':
                self.direction = 'right'
And the score:
    def score(self):
        return len(self.body) - 1
We subtract 1 because the snake starts with one segment, so score starts at 0.
Step 3: The Apple Class
class Apple:
    def __init__(self):
        self.position = None

    def regen(self):
        self.position = (random.randint(0, 19), random.randint(0, 14))

    def draw(self, screen):
        if self.position:
            pygame.draw.rect(screen, 'Red', (self.position[0] * 21 + 25, self.position[1] * 21 + 25, 20, 20))
Short and sweet. The apple knows its position, can regenerate somewhere random, and can draw itself. That's it.
Step 4: The World Class
The World ties everything together:
class World:
    def __init__(self):
        pygame.init()
        self.font = pygame.font.Font(None, 25)
        self.screen = pygame.display.set_mode((800, 400))
        self.regen()

    def regen(self):
        self.snake = Snake()
        self.apple = Apple()
        self.game_over = False
The __init__() sets up Pygame and then calls self.regen() to create a fresh snake and apple. The regen() method is also used when you press Space to restart -- it creates brand new Snake and Apple objects.
Input handling:
    def get_input(self, input_events):
        for event in input_events:
            if event.type == pygame.QUIT:
                self.quit()
            elif event.type == pygame.KEYDOWN:
                if event.key == pygame.K_ESCAPE:
                    self.quit()
                elif event.key == pygame.K_SPACE:
                    self.regen()
                else:
                    self.snake.change_direction(event.key)
See how clean this is? For direction keys, we just pass the key to the snake and let it figure out what to do. The World doesn't need to know the details of how direction-changing works.
Updating the game state:
    def update_state(self):
        if not self.apple.position:
            self.apple.regen()
        if not self.game_over:
            self.game_over = self.snake.update(self.apple)
Two lines. If there's no apple, make one. If the game isn't over, update the snake (and store whether it died).
Drawing:
    def draw(self):
        self.screen.fill('Blue')
        for x in range(20):
            for y in range(15):
                pygame.draw.rect(self.screen, 'Black', (x * 21 + 25, y * 21 + 25, 20, 20))
        self.draw_text("SCORE: %d" % self.snake.score(), "Green", 500, 25)
        if self.game_over:
            self.draw_text("GAME OVER", "Green", 25, 360)
        self.apple.draw(self.screen)
        self.snake.draw(self.screen)
        pygame.display.update()
The World draws the background grid, then tells the apple and snake to draw themselves. Each object handles its own drawing.
A little helper for text:
    def draw_text(self, text, color, x, y):
        text_image = self.font.render(text, True, color)
        self.screen.blit(text_image, ((x, y)))

    def quit(self):
        pygame.quit()
        exit()
Step 5: The Main Loop
Here's the payoff. After all that class setup, the main game loop is beautifully simple:
world = World()
while True:
    world.get_input(pygame.event.get())
    world.update_state()
    world.draw()
    time.sleep(1 / 4)
Four lines! Create a world, then every frame: get input, update, draw, wait. That's the game loop pattern, and it's how real games are structured. Every game you've ever played does basically this.
Compare that to the tangled mess of Lesson 18. Same game, way cleaner code.
The Full Code
You can see the complete file in [snake.py](snake.py). It puts all of the steps above together into one file.
Run It!
pip3 install pygame
python3 snake.py
Same controls as before -- arrow keys to move, Space to restart, Escape to quit.
You'll notice this version runs a bit slower (time.sleep(1 / 4) instead of 1 / 10). You can change that speed in the last line.
Experiments
- Speed it up -- Change
time.sleep(1 / 4)totime.sleep(1 / 10)to match the old version's speed. Try1 / 15for a real challenge.
- Add a method -- Add a
length()method to the Snake class that returnslen(self.body). Use it somewhere in the World.
- Color the head differently -- In
Snake.draw(), draw the first segment (index 0) in a different color from the rest. Maybe a green head with a yellow body?
- Make the apple blink -- In
Apple.draw(), usetime.time()to check the time and only draw the apple every other half-second. (Hint:int(time.time() * 2) % 2 == 0)
- Add a speed boost -- Make the game get faster as the score goes up. Instead of a fixed
time.sleep(1 / 4), calculate the delay based onworld.snake.score().
Challenge
Add a Poison Apple class. It works like a regular Apple but it's colored purple and makes the snake shorter by one segment when eaten (use self.body.pop() an extra time). The World should have both a regular Apple and a Poison Apple on screen at the same time.
The Hero
Build a tile-based dungeon world with a player that moves around and a camera that follows them.
By the end of this section, you'll be building a playable game just like this one. Arrow keys to move!
How Tile Maps Work
In the Snake game, everything lived on one screen. But real dungeon crawlers have big worlds you explore. So how do they pull that off?
The trick is a tile map -- a 2D list where each number means a different kind of tile. Think of it like graph paper where you've colored in certain squares:
This is the same technique Zelda uses for its dungeon rooms. Every tile on the floor is stored as a number in a grid — walkable, wall, water, lava. Our dungeon works the same way.
tile_map = [
    [1, 1, 1, 1, 1],
    [1, 0, 0, 0, 1],
    [1, 0, 0, 0, 1],
    [1, 0, 0, 0, 1],
    [1, 1, 1, 1, 1],
]
Here, 0 means floor (you can walk on it) and 1 means wall (you can't). That little map is a room with walls around it.
Each tile is TILE_SIZE pixels wide and tall. We'll use TILE_SIZE = 32, so a 25x20 map is 800x640 pixels -- bigger than our 800x600 screen. That's the whole point: the map is bigger than the screen, so we need a camera to show just part of it.
Grid-Based Movement
Instead of moving pixel by pixel, our hero moves one whole tile at a time. Press Right, and the player jumps from tile (3, 5) to tile (4, 5). This keeps everything neat and lined up.
Before moving, we check: is the tile we want to move to a wall? If it is, we just don't move. That's wall collision -- and it's surprisingly simple.
# Check if the tile at (new_x, new_y) is walkable
if tile_map[new_y][new_x] == 0:
    self.x = new_x
    self.y = new_y
Now here's something that trips up everyone at first: it's tile_map[y][x], not tile_map[x][y]. The first index picks the row (y), the second picks the column (x). Keep an eye on that -- it'll bite you if you mix them up.
The Camera
You know how in a big game, the world scrolls as your character moves? That's what the camera does. If the player is at tile (15, 10) and each tile is 32 pixels, they're at pixel (480, 320). But our screen is only 800x600. If we just drew everything starting at pixel (0, 0), the player would eventually walk right off the screen.
The fix: calculate a camera offset. We figure out where the player is in pixels, then subtract half the screen size so the player stays in the center:
camera_x = player.x * TILE_SIZE - SCREEN_WIDTH // 2 + TILE_SIZE // 2
camera_y = player.y * TILE_SIZE - SCREEN_HEIGHT // 2 + TILE_SIZE // 2
Then when drawing every tile, we subtract the camera offset:
screen_x = col * TILE_SIZE - camera_x
screen_y = row * TILE_SIZE - camera_y
The player stays in the middle, and the world scrolls around them. Pretty neat, right?
Step-by-Step Build
Step 1: Imports and constants
import pygame
import sys

SCREEN_WIDTH = 800
SCREEN_HEIGHT = 600
TILE_SIZE = 32
FPS = 60
Step 2: The tile map
We define a big map as a list of lists. Ones are walls, zeros are floors. We'll make some rooms connected by corridors.
TILE_MAP = [
    [1,1,1,1,1,1,1,1,1,1,1,1,1,1,1,1,1,1,1,1,1,1,1,1,1],
    [1,0,0,0,0,0,1,0,0,0,0,0,0,1,0,0,0,0,0,0,0,0,0,0,1],
    [1,0,0,0,0,0,1,0,0,0,0,0,0,1,0,0,0,0,0,0,0,0,0,0,1],
    # ... (the full map is in dungeon.py)
]
Step 3: The Player class
class Player:
    def __init__(self, x, y):
        self.x = x
        self.y = y
        self.color = (0, 150, 255)
        self.speed = 1

    def move(self, dx, dy, tile_map):
        new_x = self.x + dx * self.speed
        new_y = self.y + dy * self.speed
        if tile_map[new_y][new_x] == 0:
            self.x = new_x
            self.y = new_y

    def draw(self, screen, camera_x, camera_y):
        px = self.x * TILE_SIZE - camera_x
        py = self.y * TILE_SIZE - camera_y
        pygame.draw.rect(screen, self.color, (px + 2, py + 2, TILE_SIZE - 4, TILE_SIZE - 4))
The + 2 and - 4 make the player slightly smaller than a tile so you can see the floor underneath. It looks way better.
Step 4: The Game class
The Game class holds everything together: the screen, the map, the player, and the game loop.
class Game:
    def __init__(self):
        pygame.init()
        self.screen = pygame.display.set_mode((SCREEN_WIDTH, SCREEN_HEIGHT))
        pygame.display.set_caption("Dungeon Crawler")
        self.clock = pygame.time.Clock()
        self.font = pygame.font.Font(None, 28)
        self.tile_map = TILE_MAP
        self.player = Player(2, 2)
        self.camera_x = 0
        self.camera_y = 0
        self.running = True
Step 5: Input handling
We handle movement in KEYDOWN events, which fire once per press. That way the player moves one tile each time you tap a key -- no weirdness from holding it down.
def handle_input(self):
    for event in pygame.event.get():
        if event.type == pygame.QUIT:
            self.running = False
        elif event.type == pygame.KEYDOWN:
            if event.key == pygame.K_UP:
                self.player.move(0, -1, self.tile_map)
            elif event.key == pygame.K_DOWN:
                self.player.move(0, 1, self.tile_map)
            elif event.key == pygame.K_LEFT:
                self.player.move(-1, 0, self.tile_map)
            elif event.key == pygame.K_RIGHT:
                self.player.move(1, 0, self.tile_map)
Step 6: Camera update
def update(self):
    self.camera_x = self.player.x * TILE_SIZE - SCREEN_WIDTH // 2 + TILE_SIZE // 2
    self.camera_y = self.player.y * TILE_SIZE - SCREEN_HEIGHT // 2 + TILE_SIZE // 2
Step 7: Drawing
def draw(self):
    self.screen.fill((0, 0, 0))

    # Draw tiles
    for row in range(len(self.tile_map)):
        for col in range(len(self.tile_map[row])):
            sx = col * TILE_SIZE - self.camera_x
            sy = row * TILE_SIZE - self.camera_y
            if -TILE_SIZE < sx < SCREEN_WIDTH and -TILE_SIZE < sy < SCREEN_HEIGHT:
                if self.tile_map[row][col] == 1:
                    pygame.draw.rect(self.screen, (100, 60, 20), (sx, sy, TILE_SIZE, TILE_SIZE))
                else:
                    pygame.draw.rect(self.screen, (50, 50, 50), (sx, sy, TILE_SIZE, TILE_SIZE))

    # Draw player
    self.player.draw(self.screen, self.camera_x, self.camera_y)

    # HUD
    pos_text = self.font.render(f"Position: ({self.player.x}, {self.player.y})", True, (255, 255, 255))
    self.screen.blit(pos_text, (10, 10))

    pygame.display.flip()
Notice the if -TILE_SIZE < sx < SCREEN_WIDTH check -- we skip tiles that are off-screen. No point drawing what you can't see.
Step 8: Main loop
def run(self):
    while self.running:
        self.handle_input()
        self.update()
        self.draw()
        self.clock.tick(FPS)
    pygame.quit()
    sys.exit()
The Full Game
The complete file is saved as dungeon.py in this folder. It has a full 25x20 map with multiple rooms and corridors to explore.
Run It!
python3 dungeon.pyUse the arrow keys to walk around. You should see the dungeon scroll as you move. Walls are brown, floors are dark gray, and you're the blue square.
Experiments
- Make a bigger map. Add more rows and columns to
TILE_MAP. Make a maze! Just remember to surround it with walls.
- Change the player color. Try
(255, 0, 0)for red or(0, 255, 0)for green. Pick your hero's color.
- Speed up movement. What happens if you change
self.speed = 1toself.speed = 2in the Player class? (Hint: you might jump over walls!)
- Change the tile size. Try
TILE_SIZE = 64for a zoomed-in view orTILE_SIZE = 16for a zoomed-out view. The whole feel of the game changes.
- Add a new tile type. Use
2for water tiles. Draw them blue and let the player walk on them (but maybe slowly later).
Challenge
Add a treasure tile. Use the number 2 in the tile map for treasure spots. Draw them as yellow squares. When the player walks onto a treasure tile, change it to 0 (regular floor) and add 1 to a score counter. Show the score in the HUD next to the position.
Enemies
Add wandering zombies and chasing skeletons to the dungeon, plus a health system.
By the end of this section, you'll be building a playable game just like this one. Arrow keys to move!
Two Kinds of Enemy Brains
Enemies need to decide where to move, and that decision-making is called AI (artificial intelligence). Don't worry, it's not actually intelligent -- it's just a few if statements pretending to be smart.
We'll make two enemy types, each with a different "brain":
If you've played Minecraft, zombies there work almost identically to what we're about to build — they shamble randomly unless they spot you, then they chase. Our skeleton AI is basically the same as Minecraft's skeleton pathfinding (just simpler).
Zombie (green): Dumb and random. Every 30 frames, it picks a random direction (up, down, left, right) and tries to move there. If there's a wall, it just stays put. Zombies wander around aimlessly -- think of them like bumper cars with no driver.
Skeleton (white): Smarter and scarier. Every 20 frames, it looks at where you are and moves one tile closer. If you're to the right, the skeleton moves right. If you're above, it moves up. Skeletons hunt you down, and they're relentless.
How does the skeleton know how far away you are? Distance formula: dist = sqrt((x2-x1)² + (y2-y1)²). That's the Pythagorean theorem — a² + b² = c². The horizontal distance is one side of the triangle, the vertical distance is the other, and the straight-line distance is the hypotenuse. You just used math from ancient Greece to make a video game enemy chase you. Pythagoras would be proud.
Frame Counters
You know how the game runs at 60 frames per second? If enemies moved every single frame, they'd be zooming around like maniacs. Instead, each enemy has a move_timer that counts up. When it hits a certain number, the enemy moves and the timer resets to 0.
self.move_timer += 1
if self.move_timer >= self.move_delay:
    self.move_timer = 0
    # Actually move now
This is a pattern you'll use constantly in game dev. Want something to happen every half second at 60 FPS? Set the delay to 30. Want it every two seconds? Set it to 120. Easy.
Damage Cooldown
When the player touches an enemy, they should take damage -- but not 60 damage per second! That would be instant death. So we use a damage cooldown: after taking a hit, the player is invincible for 1 second (60 frames). This gives them time to run away.
if self.damage_cooldown <= 0:
    self.health -= 1
    self.damage_cooldown = 60  # 1 second at 60 FPS
Think of it like those old games where your character blinks after getting hurt -- that blinking means you're temporarily safe.
Step-by-Step Build
We're keeping everything from Lesson 20 and adding to it. Here's what's new.
Step 1: Add health to the Player
class Player:
    def __init__(self, x, y):
        self.x = x
        self.y = y
        self.color = (0, 150, 255)
        self.speed = 1
        self.health = 10
        self.max_health = 10
        self.damage_cooldown = 0
The damage_cooldown counts down each frame. When it hits 0, the player can take damage again.
Step 2: The Enemy class
class Enemy:
    def __init__(self, x, y, enemy_type):
        self.x = x
        self.y = y
        self.enemy_type = enemy_type
        self.move_timer = 0

        if enemy_type == "zombie":
            self.color = (0, 180, 0)      # Green
            self.health = 3
            self.move_delay = 30           # Moves every 30 frames
        elif enemy_type == "skeleton":
            self.color = (220, 220, 220)   # White-ish
            self.health = 5
            self.move_delay = 20           # Moves every 20 frames
Step 3: Enemy movement
The update() method is where the AI lives. Zombies pick random directions, skeletons chase the player.
def update(self, tile_map, player):
    self.move_timer += 1
    if self.move_timer < self.move_delay:
        return

    self.move_timer = 0
    dx, dy = 0, 0

    if self.enemy_type == "zombie":
        direction = random.choice([(0, -1), (0, 1), (-1, 0), (1, 0)])
        dx, dy = direction
    elif self.enemy_type == "skeleton":
        if player.x > self.x:
            dx = 1
        elif player.x < self.x:
            dx = -1
        elif player.y > self.y:
            dy = 1
        elif player.y < self.y:
            dy = -1

    new_x = self.x + dx
    new_y = self.y + dy
    if tile_map[new_y][new_x] == 0:
        self.x = new_x
        self.y = new_y
Notice the skeleton only moves in one direction at a time -- it picks horizontal first, then vertical. This makes it beeline toward you but not move diagonally.
Step 4: Collision with the player
In the Game's update() method, check if any enemy is on the same tile as the player:
for enemy in self.enemies:
    if enemy.x == self.player.x and enemy.y == self.player.y:
        if self.player.damage_cooldown <= 0:
            self.player.health -= 1
            self.player.damage_cooldown = 60
Step 5: Health bar
Draw a red bar at the top of the screen that shrinks as health drops:
bar_width = 200
bar_height = 20
health_ratio = self.player.health / self.player.max_health
# Background (dark red)
pygame.draw.rect(self.screen, (80, 0, 0), (10, 10, bar_width, bar_height))
# Foreground (bright red)
pygame.draw.rect(self.screen, (220, 0, 0), (10, 10, bar_width * health_ratio, bar_height))
Step 6: Game Over
When health hits 0, show "GAME OVER" and wait for Space to restart:
if self.player.health <= 0:
    self.game_over = True
The Full Game
The complete file is saved as dungeon.py in this folder. It includes all the enemy logic, health system, game over screen, and restart functionality.
Run It!
python3 dungeon.pyWalk around with arrow keys. You'll see green zombies wandering and white skeletons hunting you. Try to avoid them! Watch your health bar -- when it empties, it's game over. Press Space to restart.
Experiments
- More enemies. In the
spawn_enemiesmethod, add more enemies. Try 8 or 10. Does it get harder?
- Change enemy speed. Set a zombie's
move_delayto 10 (super fast zombie!) or a skeleton's to 60 (lazy skeleton).
- Different damage. Make skeletons do 2 damage instead of 1 when they touch you.
- Faster cooldown. Change the damage cooldown from 60 to 20. Now getting touched is much more dangerous!
- Player color flash. When the player takes damage, briefly change their color to red, then back to blue.
Challenge
Add a safe room. Use tile type 2 for safe zone tiles (draw them slightly green). When the player is standing on a safe tile, enemies can't damage them and the player slowly regenerates 1 HP every 2 seconds.
Combat
Give the hero a sword attack so they can fight back against enemies.
By the end of this section, you'll be building a playable game just like this one. Arrow keys to move, Space to attack!
Facing Direction
So up until now, the player was just a square scooting around. But if we want to swing a sword, we need to know which way the player is actually looking.
This is exactly how combat works in Zelda — Link always swings his sword in the direction he's facing. The game tracks which way you moved last and uses that to aim your attack.
Think of it like this: if you press the right arrow, you're now facing right. If you attack, the sword swings to the right and hits whatever is on the tile next to you.
We keep track of facing as a simple string: "up", "down", "left", or "right". Every time you move, we update it:
def move(self, dx, dy, tile_map):
    if dx == 1:
        self.facing = "right"
    elif dx == -1:
        self.facing = "left"
    elif dy == -1:
        self.facing = "up"
    elif dy == 1:
        self.facing = "down"
    # ... then actually move
Attack Mechanics
When you press Space, the player attacks. Here's what happens behind the scenes:
- Check if the attack cooldown is 0 (can we swing yet?)
- Find the tile in front of the player (based on facing direction)
- Check if any enemy is standing on that tile
- If so, deal 3 damage to that enemy
- Start the attack cooldown (30 frames = 0.5 seconds)
- Start the attack animation (show a yellow slash for a few frames)
def attack(self, enemies):
    if self.attack_timer > 0:
        return  # Still cooling down

    self.attack_timer = 30  # 0.5 second cooldown
    self.attacking = True
    self.attack_frame = 6  # Show animation for 6 frames

    # Find the tile we're attacking
    tx, ty = self.x, self.y
    if self.facing == "up":    ty -= 1
    if self.facing == "down":  ty += 1
    if self.facing == "left":  tx -= 1
    if self.facing == "right": tx += 1

    for enemy in enemies:
        if enemy.x == tx and enemy.y == ty:
            enemy.take_damage(3)
The cooldown is important because without it, you could just mash Space and destroy everything instantly. You know how in most games there's a little pause between swings? That's exactly what attack_timer does.
Enemy Hit Flash and Death
When an enemy gets hit, we want it to feel like it got hit. Just subtracting health silently would be boring. So we do two things:
Hit flash: The enemy turns white for 5 frames, then goes back to normal. It's a quick "your attack connected!" signal.
Death animation: When an enemy's health drops to 0 or below, it doesn't just vanish. Instead it rapidly flashes between white and its normal color for 10 frames, then disappears. This looks way better than just popping out of existence.
def take_damage(self, amount):
    self.health -= amount
    self.hit_flash = 5  # Flash white for 5 frames
    if self.health <= 0:
        self.death_timer = 10  # Death animation
Step-by-Step Build
Everything from Lessons 12 and 13 is still here. Here's what we're adding.
Step 1: Player gains attack abilities
New attributes for the Player class:
self.facing = "down"       # Which direction we're looking
self.attack_timer = 0      # Cooldown counter (counts down to 0)
self.attacking = False     # Are we currently showing an attack animation?
self.attack_frame = 0      # Frames left in attack animation
Step 2: The attack method
When Space is pressed, calculate the target tile and check for enemies there:
def attack(self, enemies):
    if self.attack_timer > 0:
        return

    self.attack_timer = 30
    self.attacking = True
    self.attack_frame = 6

    tx, ty = self.x, self.y
    if self.facing == "up":    ty -= 1
    if self.facing == "down":  ty += 1
    if self.facing == "left":  tx -= 1
    if self.facing == "right": tx += 1

    for enemy in enemies:
        if enemy.x == tx and enemy.y == ty:
            enemy.take_damage(3)
Step 3: Attack animation drawing
Draw a yellow/orange rectangle on the tile the player is attacking:
if self.attacking and self.attack_frame > 0:
    tx, ty = self.x, self.y
    if self.facing == "up":    ty -= 1
    if self.facing == "down":  ty += 1
    if self.facing == "left":  tx -= 1
    if self.facing == "right": tx += 1
    ax = tx * TILE_SIZE - camera_x
    ay = ty * TILE_SIZE - camera_y
    pygame.draw.rect(screen, (255, 200, 0), (ax + 4, ay + 4, TILE_SIZE - 8, TILE_SIZE - 8))
Step 4: Enemy takes damage
Add hit_flash, death_timer, take_damage(), and is_alive() to the Enemy class:
def take_damage(self, amount):
    self.health -= amount
    self.hit_flash = 5
    if self.health <= 0:
        self.death_timer = 10

def is_alive(self):
    if self.health > 0:
        return True
    return self.death_timer > 0  # Still "alive" during death animation
Step 5: Enemy draw with flash effects
When drawing, check if the enemy should flash:
def draw(self, screen, camera_x, camera_y):
    px = self.x * TILE_SIZE - camera_x
    py = self.y * TILE_SIZE - camera_y

    color = self.color
    if self.health <= 0:
        # Death flash: alternate white and normal
        color = WHITE if self.death_timer % 2 == 0 else self.color
    elif self.hit_flash > 0:
        color = WHITE

    pygame.draw.rect(screen, color, (px + 4, py + 4, TILE_SIZE - 8, TILE_SIZE - 8))
Step 6: Kill counter
The Game class tracks kill_count. When we remove dead enemies, we count them:
before = len(self.enemies)
self.enemies = [e for e in self.enemies if e.is_alive()]
self.kill_count += before - len(self.enemies)
Step 7: Attack cooldown bar
A small blue bar under the health bar shows when you can attack again:
cooldown_ratio = self.player.attack_timer / 30
pygame.draw.rect(screen, (0, 80, 160), (10, 35, int(100 * cooldown_ratio), 8))
When the bar is empty, you can swing again.
The Full Game
The complete file is saved as dungeon.py in this folder. It has the full combat system with all the visual effects.
Run It!
python3 dungeon.pyWalk around with arrow keys. Press Space to attack in the direction you're facing. You'll see a yellow flash on the tile you hit. Enemies flash white when damaged, then flash rapidly and disappear when they die. Your kill count shows in the HUD.
Experiments
- Change attack damage. In the
attack()method, change the damage from 3 to 1. Now enemies take more hits to kill — more challenging!
- Bigger attack range. What if your sword could hit 2 tiles ahead? Change the target calculation to multiply the direction by 2.
- Faster attacks. Set
attack_timer = 10instead of 30. Now you can swing super fast!
- More enemies. Add 6 more enemies in
spawn_enemies. With this many, combat gets intense.
- Different attack colors. Change the attack flash from yellow
(255, 200, 0)to whatever you want. Try red(255, 50, 0)for a fiery look.
Challenge
Add an area attack. When the player presses X (instead of Space), they do a spin attack that hits all 4 tiles around them (up, down, left, right) at once. But it does less damage (1 instead of 3) and has a longer cooldown (60 frames instead of 30). You'll need a separate cooldown timer for it.
Loot & Items
Add an item and inventory system so defeated enemies drop loot, and you can collect and use items.
By the end of this section, you'll be building a playable game just like this one. Arrow keys to move, Space to attack!
How Loot Works in Games
You know how in Minecraft Dungeons, when you beat a mob it might drop an item? Maybe a sword, maybe a potion, maybe nothing at all. You pick it up, it goes in your inventory, and you use it when you need it.
We're going to build exactly that system. Here's the plan:
- When an enemy dies, there's a 40% chance it drops a random item
- Items sit on the ground as little colored squares
- Walk over an item to pick it up (goes into your inventory)
- Press 1-5 to use an item from your inventory
- Treasure chests on the map give you loot too
The Item Class
Items are pretty simple. They just need a position, a type, and a color:
class Item:
    def __init__(self, x, y, item_type):
        self.x = x
        self.y = y
        self.item_type = item_type
        if item_type == "health_potion":
            self.color = (255, 50, 50)       # Red
        elif item_type == "speed_boost":
            self.color = (0, 255, 255)        # Cyan
        elif item_type == "power_sword":
            self.color = (255, 165, 0)        # Orange
Items get drawn as small squares — half the tile size — so they look like little pickups sitting on the floor:
def draw(self, screen, cam_x, cam_y):
    sx = self.x * TILE_SIZE - cam_x + TILE_SIZE // 4
    sy = self.y * TILE_SIZE - cam_y + TILE_SIZE // 4
    pygame.draw.rect(screen, self.color, (sx, sy, TILE_SIZE // 2, TILE_SIZE // 2))
Enemy Drops
When an enemy dies, we roll the dice. random.random() gives a number between 0 and 1. If it's less than 0.4, that's a 40% chance — the enemy drops something:
if random.random() < 0.3 means "30% chance." This is probability — the same math that describes dice rolls and coin flips. Real games use loot tables: a sword might have a 5% drop rate, a health potion 30%, and gold 65%. Those numbers add up to 100%. Game designers spend weeks tuning these percentages to make the game feel rewarding but not too easy. You're doing the same thing.
if random.random() < 0.4:
    item_type = random.choice(["health_potion", "speed_boost", "power_sword"])
    self.items.append(Item(enemy.x, enemy.y, item_type))
Think of it like a loot table. Every time an enemy goes down, the game basically flips a coin (well, a weighted coin) to decide if you get anything.
Picking Up Items
When the player walks onto a tile that has an item, we add it to the inventory (if there's room):
for item in self.items[:]:
    if item.x == self.player.x and item.y == self.player.y:
        if len(self.player.inventory) < 5:
            self.player.inventory.append(item.item_type)
            self.items.remove(item)
The [:] makes a copy of the list so we can safely remove items while looping. That's a handy Python trick you'll use a lot — if you try to remove things from a list while you're looping over it without making a copy first, weird things happen.
Using Items
Press number keys 1 through 5 to use items from your inventory:
if event.key in [pygame.K_1, pygame.K_2, pygame.K_3, pygame.K_4, pygame.K_5]:
    slot = event.key - pygame.K_1  # Converts to 0-4
    if slot < len(self.player.inventory):
        item_type = self.player.inventory.pop(slot)
        if item_type == "health_potion":
            self.player.health = min(self.player.health + 5, self.player.max_health)
        elif item_type == "speed_boost":
            self.player.speed_boost_timer = 150  # ~5 seconds at 30fps
        elif item_type == "power_sword":
            self.player.damage_boost_timer = 150
The speed boost makes the player move every frame instead of having a movement delay. The power sword doubles your damage. Both last about 5 seconds. That event.key - pygame.K_1 line is a neat trick — it converts the key code into a 0-4 index so we know which inventory slot was pressed.
Treasure Chests
We add a new tile type: 3 means chest. On the map it looks like a brown/yellow square. When you walk into it, it opens (turns into floor) and spawns a random item:
if self.tile_map[new_y][new_x] == 3:
    self.tile_map[new_y][new_x] = 0  # Open the chest (becomes floor)
    item_type = random.choice(["health_potion", "speed_boost", "power_sword"])
    self.items.append(Item(new_x, new_y, item_type))
Drawing the Inventory
At the bottom of the screen, we show colored squares for each item in the inventory, with number labels:
for i, item_type in enumerate(self.player.inventory):
    color = {"health_potion": (255, 50, 50), "speed_boost": (0, 255, 255),
             "power_sword": (255, 165, 0)}[item_type]
    x = 10 + i * 50
    y = 560
    pygame.draw.rect(screen, color, (x, y, 32, 32))
    label = self.font.render(str(i + 1), True, (255, 255, 255))
    screen.blit(label, (x + 12, y - 18))
The HUD
The heads-up display now shows:
- Health bar (top-left)
- Kill count
- Active effects (speed/power icons when active)
- Inventory bar (bottom)
Step-by-Step Build
The full file builds on everything from lessons 12-14 (player, enemies, combat) and adds:
- The
Itemclass - Inventory on the
Playerclass (a list, plus boost timers) - Random drops from dead enemies
- Pickup logic in the game update
- Number key handling for using items
- Treasure chests on the map
- Updated HUD drawing
The complete code is in dungeon.py — save it and run it!
Run It!
python3 dungeon.pyMove with arrow keys, attack with Space, and press 1-5 to use items. Walk over items to pick them up, and walk into the brown/yellow chests to open them.
Experiments
- Change the drop rate — find
0.4and change it to1.0so every enemy drops something. Or try0.1for rare drops. - Super potions — change the health potion to restore 20 HP instead of 5. Now they feel powerful.
- Longer boosts — change
150frames to300for speed and power boosts. Double the fun! - More inventory slots — change the max from 5 to 10. Update the drawing too.
- New item type — try adding a "shield" item that sets a
shield_timerand reduces damage taken.
Challenge
Add a gold coin item type (yellow color). Instead of going to inventory, coins add to a score counter displayed on the HUD. Make enemies drop coins 30% of the time (separately from the 40% item drop). Show "Gold: X" on screen.
Multiple Rooms
Create a dungeon with 5 connected rooms, door transitions, and a minimap to track where you've been.
By the end of this section, you'll be building a playable game just like this one. Arrow keys to move, Space to attack!
Why Multiple Rooms?
Right now our dungeon is one big open area. But real dungeon crawlers have rooms you move between — each room is its own mini-challenge. Think of it like floors in Minecraft Dungeons, except we're using doors instead of staircases.
Here's the plan:
- 5 rooms, each with its own tile map and enemies
- Doors (tile type 2) connect the rooms
- Walk into a door and you teleport to the next room
- A minimap shows which rooms you've visited
The Room Class
Each room is basically a self-contained little world:
class Room:
    def __init__(self, tile_map, enemy_spawns, chest_positions, player_start, door_connections):
        self.tile_map = [row[:] for row in tile_map]  # deep copy
        self.enemies = []
        self.items = []
        self.enemy_spawns = enemy_spawns
        self.chest_positions = chest_positions
        self.player_start = player_start
        self.door_connections = door_connections
        self.visited = False
        self.chests_opened = set()
The big new thing here is door_connections. It's a dictionary that maps a door's position to where it leads:
door_connections = {
    (9, 7): (1, 1, 7),   # door at (9,7) leads to room 1, spawn at (1,7)
}
So when the player walks into the door at column 9, row 7, we switch to room index 1 and place the player at (1, 7) in that room. It's kind of like a teleporter — you step on this spot, and boom, you're somewhere else.
Room Transitions
When you step on a door tile, the game does three things:
- Looks up where this door leads in the
door_connectionsdict - Flashes the screen white for a few frames (transition effect)
- Loads the new room and places the player at the spawn point
if tile == 2:
    door_pos = (new_x, new_y)
    connections = current_room.door_connections
    if door_pos in connections:
        room_idx, spawn_x, spawn_y = connections[door_pos]
        self.transition_to_room(room_idx, spawn_x, spawn_y)
The transition effect is simple — we just fill the screen white for a few frames:
def transition_to_room(self, room_idx, spawn_x, spawn_y):
    self.flash_timer = 8  # white flash for 8 frames
    self.current_room_idx = room_idx
    room = self.rooms[room_idx]
    if not room.visited:
        room.visited = True
        room.spawn_enemies()
    self.player.x = spawn_x
    self.player.y = spawn_y
That white flash is a classic game trick. Without it, the room switch would feel instant and jarring. With it, your brain goes "oh, I'm transitioning somewhere" and it feels smooth.
Spawning Enemies Per Room
Each room only spawns enemies the first time you enter. After that, whatever enemies you killed stay dead, and any items stay on the ground. This is tracked by room.visited.
def spawn_enemies(self):
    for x, y, enemy_type in self.enemy_spawns:
        self.enemies.append(Enemy(x, y, enemy_type))
This is nice because it means you can clear a room, leave, and come back to grab items you left behind without getting ambushed again.
The Room Layouts
We create 5 rooms. Each one is about 20 columns by 15 rows:
- Room 0 (Start): A simple room with a couple zombies. Door on the right.
- Room 1 (Corridor): A narrow hallway-like room. Doors on left and right.
- Room 2 (Arena): Open room with several enemies and chests. Door on left and bottom.
- Room 3 (Maze): Twisty corridors with skeletons. Door on top and right.
- Room 4 (Boss Room): Big empty room. No enemies yet — this is where the boss will go in Lesson 25!
The Minimap
The minimap sits in the top-right corner. It's just small rectangles showing which rooms you've found:
def draw_minimap(self):
    base_x = SCREEN_WIDTH - 120
    base_y = 10
    # Room positions on minimap (hand-placed to look like a map)
    positions = [(0, 1), (1, 1), (2, 1), (2, 2), (3, 1)]
    for i, (mx, my) in enumerate(positions):
        rx = base_x + mx * 25
        ry = base_y + my * 20
        if i == self.current_room_idx:
            color = WHITE
        elif self.rooms[i].visited:
            color = GRAY
        else:
            continue  # don't show unvisited rooms
        pygame.draw.rect(self.screen, color, (rx, ry, 20, 15))
Visited rooms are gray, the current room is white, and rooms you haven't found yet are invisible. It's a small detail but it makes exploring feel way more satisfying — you can see your progress!
Step-by-Step Build
This lesson builds on everything from Lesson 23:
- Create the
Roomclass to hold maps, enemies, items, and door connections - Define 5 room layouts as 2D lists
- Set up door connections between rooms
- Add transition logic (flash + room switch)
- Update the game loop to work with
current_roominstead of a single map - Draw the minimap
- Player HP and inventory carry between rooms
The full code is in dungeon.py.
Run It!
python3 dungeon.pyMove with arrow keys, attack with Space, 1-5 for items. Walk into the dark brown doors to move between rooms. Check the minimap in the top-right to see where you've been.
Experiments
- Add a 6th room — copy one of the room maps, add it to the rooms list, and connect it with doors.
- Change room colors — give each room a different floor color to make them feel distinct.
- More enemies — double the enemy spawns in Room 2 to make it a real challenge.
- Locked doors — make a door that only opens if you have a "key" item in your inventory.
- Room names — display the room name at the top of the screen when you enter (like "The Crypt" or "Skeleton Hall").
Challenge
Add a room clear bonus: when all enemies in a room are defeated, spawn a special chest in the center of the room. This rewards the player for fighting instead of running past enemies.
The Boss
Add a boss fight to the final room with attack phases, a big health bar, and a victory screen.
By the end of this section, you'll be building a playable game just like this one. Arrow keys to move, Space to attack!
What Is a State Machine?
Okay, so a state machine is just a fancy name for when something has different "modes" and switches between them based on rules. You already know state machines from real life — you just didn't know they had a name:
- A traffic light: green -> yellow -> red -> green (repeats)
- You in the morning: sleeping -> alarm -> getting ready -> school
Our boss works the same way. It has phases:
Think of any Zelda boss — they always follow a pattern. Ganondorf charges, then rests, then summons minions, then charges again. Figuring out the pattern is how you beat them. Our boss works the same way!
- Chase — slowly follows the player for 5 seconds
- Charge — picks a direction and zooms toward the player for 2 seconds (ouch!)
- Rest — stops to catch its breath for 2 seconds
- Summon — stops and spawns 2 zombie minions (only does this twice total)
The cycle goes: chase -> charge -> rest -> chase -> summon -> charge -> rest -> repeat
In code, the boss has a phase variable (a string like "chase" or "charge") and a phase_timer that counts down. When the timer hits zero, it switches to the next phase. It's the same countdown idea we used for attack cooldowns, just applied to boss behavior.
The Boss Class
The boss is bigger than regular enemies — it takes up a 2x2 tile area. Here's the core of the class:
class Boss:
    def __init__(self, x, y):
        self.x = x
        self.y = y
        self.health = 50
        self.max_health = 50
        self.size = 2  # 2x2 tiles
        self.phase = "chase"
        self.phase_timer = 150  # 5 seconds at 30fps
        self.charge_dx = 0
        self.charge_dy = 0
        self.minions_spawned = 0  # only spawns twice
        self.hit_flash = 0
        self.move_timer = 0
        self.phase_cycle = 0  # tracks position in the phase cycle
That's a lot of variables, but each one does one specific job. The phase_cycle is just an index that tells us where we are in the list of phases.
Phase Logic
Each frame, we check what phase the boss is in and act accordingly:
def update(self, player, tile_map, enemies):
    self.phase_timer -= 1
    if self.phase_timer <= 0:
        self.next_phase()

    if self.phase == "chase":
        # Move toward player slowly (every 15 frames)
        ...
    elif self.phase == "charge":
        # Move fast in chosen direction (every 3 frames)
        ...
    elif self.phase == "summon":
        # Spawn minions once, then wait
        ...
    elif self.phase == "rest":
        # Do nothing, just wait
        pass
The next_phase() method handles the cycle:
def next_phase(self):
    cycle = ["chase", "charge", "rest", "chase", "summon", "charge", "rest"]
    self.phase_cycle = (self.phase_cycle + 1) % len(cycle)
    self.phase = cycle[self.phase_cycle]
    # Set timer based on new phase
    ...
That % len(cycle) is the trick that makes it loop forever. When phase_cycle reaches the end of the list, the modulo wraps it back to the beginning.
Charge Attack
The charge is the boss's scariest move. It picks the direction toward the player and then rushes that way:
if self.phase == "charge" and self.charge_dx == 0 and self.charge_dy == 0:
    # Pick direction toward player
    if abs(player.x - self.x) > abs(player.y - self.y):
        self.charge_dx = 1 if player.x > self.x else -1
    else:
        self.charge_dy = 1 if player.y > self.y else -1
During the charge, the boss moves every 3 frames instead of every 15. If it hits the player, it deals 3 damage — nasty! The key to surviving is watching for the charge wind-up and getting out of the way.
Summoning Minions
The boss can only summon minions twice total. When it enters the summon phase, it spawns 2 zombies near itself:
if self.phase == "summon" and self.minions_spawned < 2:
    # Spawn 2 zombies near the boss
    for offset in [(-2, 0), (2, 0)]:
        enemies.append(Enemy(self.x + offset[0], self.y + offset[1], "zombie"))
    self.minions_spawned += 1
This is what makes the fight hectic. You're trying to hit the boss, but suddenly there are zombies coming at you from the sides. Do you deal with the minions first, or keep focusing on the boss?
Boss Health Bar
The boss gets a big health bar across the top of the screen, separate from regular enemy health bars:
# Boss health bar
bar_x = SCREEN_WIDTH // 2 - 150
bar_y = 40
bar_w = 300
bar_h = 20
ratio = boss.health / boss.max_health
pygame.draw.rect(screen, (80, 0, 0), (bar_x, bar_y, bar_w, bar_h))
pygame.draw.rect(screen, RED, (bar_x, bar_y, int(bar_w * ratio), bar_h))
# Label
label = font.render("DUNGEON BOSS", True, RED)
screen.blit(label, label.get_rect(center=(SCREEN_WIDTH // 2, 30)))
You know how in basically every game, bosses get their own special health bar at the top? That's what we're doing here. The dark red background shows the full bar, and the bright red foreground shrinks as the boss takes damage.
Victory Screen
When the boss's health hits zero, it's celebration time! We show:
- "YOU WIN!" in big text
- Total time played
- Total kills
- Then "Press SPACE to play again"
if self.boss and self.boss.health <= 0:
    self.you_win = True
Drawing the Boss
The boss is drawn as a 2x2 tile purple/red square. When it's hit, it flashes white just like regular enemies:
def draw(self, screen, cam_x, cam_y):
    sx = self.x * TILE_SIZE - cam_x
    sy = self.y * TILE_SIZE - cam_y
    w = self.size * TILE_SIZE
    color = WHITE if self.hit_flash > 0 and self.hit_flash % 2 == 0 else (180, 40, 40)
    pygame.draw.rect(screen, color, (sx, sy, w, w))
    # Evil eyes
    pygame.draw.rect(screen, YELLOW, (sx + 12, sy + 16, 10, 8))
    pygame.draw.rect(screen, YELLOW, (sx + 42, sy + 16, 10, 8))
The evil yellow eyes are a small touch but they give the boss some personality. It's not just a big red square — it's a big red square that's staring at you.
Step-by-Step Build
This is the big one — the whole game comes together:
Bossclass with phase state machine- Boss spawns in Room 4 when you first enter
- Boss collision detection (2x2 area instead of 1x1)
- Boss health bar at top of screen
- Minion spawning during summon phase
- Victory screen when boss dies
- Full game restart on win
The complete code is in dungeon.py.
Run It!
python3 dungeon.pyFight your way through 4 rooms to reach the boss in Room 4. Use your items wisely — the boss hits hard! Defeat it to see the victory screen.
Experiments
- Buff the boss — change health from 50 to 100. Can you still win?
- Faster charges — change the charge move delay from 3 to 1. Much scarier!
- More minions — let the boss summon 3 times instead of 2, or spawn 3 minions each time.
- Boss color by phase — make the boss change color based on its current phase (red for chase, yellow for charge, purple for summon, gray for rest).
- Rage mode — when the boss drops below 25% health, make it permanently faster.
Challenge
Add a second phase to the boss fight. When the boss drops below half health, it enters "rage mode": it moves faster in chase phase (every 8 frames instead of 15), charges deal 5 damage instead of 3, and its color changes to bright red. Display "RAGE MODE!" text on screen when this happens.
Sprites & Art
Replace all those colored squares with actual character sprites -- drawn in code so you don't need any image files.
What's a Sprite?
Up until now, our player was a blue square, enemies were red and green squares, and the walls were brown rectangles. That works for testing, but it doesn't exactly look like a real game.
In game development, a sprite is an image that represents something in your game -- the player character, an enemy, a floor tile, anything. Every character in Fortnite, every block in Minecraft, every kart in Mario Kart — they're all sprites (or their 3D equivalent, models). We're making 2D sprites, which is how classic games like the original Zelda did it. Usually sprites are loaded from PNG files. But here's the thing: we don't have any PNG files yet. So we're going to create our sprites using code, which is actually pretty cool.
The trick is pygame.Surface. Think of a Surface as a little canvas you can draw on. The screen itself is a Surface. But you can also create new Surfaces, draw on them, and then paste them onto the screen. That's exactly what a sprite is -- a mini canvas with a picture on it.
# Create a 32x32 transparent surface
sprite = pygame.Surface((32, 32), pygame.SRCALPHA)

# Draw on it just like you draw on the screen
pygame.draw.circle(sprite, (255, 0, 0), (16, 16), 12)

# Later, paste it onto the screen
screen.blit(sprite, (100, 200))
The pygame.SRCALPHA flag means the surface supports transparency. Without it, the background of your sprite would be a solid black rectangle, which would look terrible -- imagine every character walking around with a black box behind them.
Drawing a Character
Let's think about what a tiny pixel-art character looks like at 32x32 pixels. You don't have much room, so keep it simple:
- A round head (circle)
- A rectangular body
- Two small legs
- Maybe a sword
Here's our player sprite function:
def create_player_sprite(facing_right=True):
    surf = pygame.Surface((TILE_SIZE, TILE_SIZE), pygame.SRCALPHA)

    # Body (blue tunic)
    pygame.draw.rect(surf, (0, 100, 220), (8, 14, 16, 12))
    # Head (skin color)
    pygame.draw.circle(surf, (240, 200, 160), (16, 10), 7)
    # Eye
    eye_x = 18 if facing_right else 12
    pygame.draw.circle(surf, (0, 0, 0), (eye_x, 9), 2)
    # Helmet
    pygame.draw.rect(surf, (120, 120, 140), (9, 3, 14, 5))
    # Legs
    pygame.draw.rect(surf, (60, 60, 80), (10, 26, 5, 5))
    pygame.draw.rect(surf, (60, 60, 80), (17, 26, 5, 5))
    # Sword
    if facing_right:
        pygame.draw.rect(surf, (200, 200, 220), (26, 8, 3, 14))
        pygame.draw.rect(surf, (180, 160, 60), (24, 18, 7, 3))
    else:
        pygame.draw.rect(surf, (200, 200, 220), (3, 8, 3, 14))
        pygame.draw.rect(surf, (180, 160, 60), (1, 18, 7, 3))

    return surf
Notice how we call it twice -- once with facing_right=True and once with facing_right=False. That gives us two versions of the player sprite. When the player walks left, we show the left-facing one. When they walk right, we show the right-facing one.
You could also use pygame.transform.flip to mirror a sprite instead of drawing both versions by hand:
sprite_left = pygame.transform.flip(sprite_right, True, False)The True, False means "flip horizontally, but not vertically." We manually drew both versions instead so the sword ends up on the correct side, but flipping is a handy shortcut when you don't need that level of control.
Tile Sprites
Tiles get the same treatment. Instead of plain colored rectangles, we draw little patterns:
- Floor tiles get a subtle grid pattern and some specks -- looks like stone
- Wall tiles get a brick pattern with mortar lines
- Door tiles look like wooden planks with a gold handle
- Chest tiles show a little treasure chest
The wall sprite is a good example of how a few lines make a huge difference:
wall = pygame.Surface((TILE_SIZE, TILE_SIZE))
wall.fill((110, 65, 25))
# Horizontal mortar lines
pygame.draw.line(wall, (80, 50, 20), (0, 8), (TILE_SIZE, 8), 1)
pygame.draw.line(wall, (80, 50, 20), (0, 16), (TILE_SIZE, 16), 1)
pygame.draw.line(wall, (80, 50, 20), (0, 24), (TILE_SIZE, 24), 1)
# Offset vertical lines for brick pattern
pygame.draw.line(wall, (80, 50, 20), (16, 0), (16, 8), 1)
pygame.draw.line(wall, (80, 50, 20), (8, 8), (8, 16), 1)
Just a few lines of code and suddenly you have bricks instead of a brown blob. That's the magic of sprites -- a little detail goes a long way.
Loading Real Images (Optional)
If you ever DO have PNG files (maybe you draw some pixel art in Aseprite or Piskel), loading them is easy:
player_image = pygame.image.load("assets/player.png").convert_alpha()The .convert_alpha() keeps transparency working. You can resize with:
player_image = pygame.transform.scale(player_image, (32, 32))In our code, we have a helper function that tries to load a file and falls back to the generated sprite if the file doesn't exist:
def try_load_sprite(filename, fallback_surface):
    try:
        img = pygame.image.load(filename).convert_alpha()
        img = pygame.transform.scale(img, fallback_surface.get_size())
        print(f"Loaded sprite: {filename}")
        return img
    except (pygame.error, FileNotFoundError):
        return fallback_surface
This is really nice because it means you can start with the code-generated sprites, and whenever you make real art, just drop it in the right folder and the game picks it up automatically. No code changes needed.
Step-by-Step Build
Step 1: Sprite creation functions
At the top of the file (after constants), add all the create_* functions:
create_player_sprite(facing_right)-- draws the knightcreate_enemy_sprite(enemy_type)-- draws zombie or skeletoncreate_boss_sprite()-- draws the 64x64 demon kingcreate_tile_sprites()-- returns a dictionary of tile surfacescreate_item_sprites()-- returns a dictionary of item surfacestry_load_sprite(filename, fallback)-- tries file, uses fallback
Step 2: Create sprites in Game.__init__
self.sprites = {}
self.sprites["player_right"] = create_player_sprite(facing_right=True)
self.sprites["player_left"] = create_player_sprite(facing_right=False)
self.sprites["zombie"] = create_enemy_sprite("zombie")
self.sprites["skeleton"] = create_enemy_sprite("skeleton")
self.sprites["boss"] = create_boss_sprite()
self.sprites["tiles"] = create_tile_sprites()
self.sprites["items"] = create_item_sprites()
Step 3: Pass sprites to game objects
When creating a Player, Enemy, Boss, or Item, pass the relevant sprites so each object knows what to draw:
self.player = Player(x, y, {"player_right": ..., "player_left": ...})
enemy = Enemy("zombie", x, y, {"zombie": ..., "skeleton": ...})
Step 4: Use sprites in draw methods
Instead of pygame.draw.rect(screen, self.color, ...), now do:
screen.blit(self.sprite, (px, py))For the player, pick the sprite based on facing:
if self.facing == "left":
    sprite = self.sprite_left
else:
    sprite = self.sprite_right
Step 5: Hit flash effect with sprites
When an enemy gets hit, we want a white flash. Here's the trick:
if self.hit_flash > 0:
    flash = self.sprite.copy()
    flash.fill(WHITE, special_flags=pygame.BLEND_ADD)
    screen.blit(flash, (px, py))
BLEND_ADD adds white to every pixel, making the whole sprite look bright. Then next frame it goes back to normal. It's the same "flash white when hit" idea from before, but now it works with sprites instead of just changing a rectangle's color.
The Full Game
The complete file is dungeon.py in this folder. It has all the sprite creation functions, all the game classes (Player, Enemy, Boss, Item, Room, Game), and the full 5-room dungeon.
Run It!
python3 dungeon.pyUse arrow keys to move, Space to attack, 1-5 for items. You should see actual character shapes instead of colored squares. The walls have a brick pattern, the floor has texture, and items have distinct shapes.
Experiments
- Change the player's tunic color. In
create_player_sprite, change(0, 100, 220)to(220, 0, 0)for a red tunic, or(0, 180, 0)for green.
- Make the zombie scarier. Add more details to
create_enemy_sprite-- maybe draw sharp teeth or bigger arms.
- Try pygame.transform.scale. Create the boss at 32x32 and then scale it up to 64x64:
pygame.transform.scale(small_boss, (64, 64)). Notice how it gets pixelated -- that's the retro look!
- Add a face to the floor tiles. Draw a tiny smiley on the floor sprite. Now every tile has a face. Creepy dungeon.
- Create your own item sprite. Add a "shield" item type with a shield shape (maybe a rounded rectangle with a cross on it).
Challenge
Create a create_player_sprite_up() and create_player_sprite_down() function that shows the player from behind (walking up) and from the front (walking down). Use them when self.facing is "up" or "down". Hint: for the "up" version, don't draw the eye -- just the back of the helmet.
Sound & Music
Add sound effects and background music to the dungeon, and learn how to handle errors gracefully when files are missing.
Why Sound Matters
Play any game with the sound off, then turn it on. Night and day, right? Sound effects give your brain feedback -- you feel the sword hit, you hear the enemy die, you know you picked up an item. Music sets the mood. A dungeon should feel tense; a boss fight should feel intense.
Pygame has a built-in sound system called pygame.mixer. It can play short sound effects (like a sword swing) and longer background music (like a dungeon theme) at the same time.
The Problem: We Don't Have Sound Files
Here's a real-world problem you'll run into all the time. We want to play sounds, but we don't have any .wav files on disk yet. If we just wrote pygame.mixer.Sound("sword.wav") and the file doesn't exist, the program would crash.
This is where try/except comes in -- honestly one of the most important things in all of programming. Think of it like this: you're telling Python "hey, try this thing, and if it blows up, do this other thing instead of crashing."
try:
    sound = pygame.mixer.Sound("assets/sword_swing.wav")
    print("Loaded sword sound!")
except (pygame.error, FileNotFoundError):
    sound = None
    print("No sword sound file found, running silent")
If the file exists, great -- we load it. If not, we set sound to None and move on. The game works either way.
This pattern is used ALL the time in real software. Video players try to load subtitles -- if the file's not there, no subtitles. Web browsers try to load images -- if the server's down, show a placeholder. Same idea everywhere.
The Sound Manager
Rather than scattering try/except blocks all over the place, we'll build a SoundManager class that handles all the sound stuff in one place:
class SoundManager:
    def __init__(self):
        self.sounds = {}
        self.volume = 0.7
        self.enabled = True

        try:
            pygame.mixer.init()
            print("Sound system initialized!")
        except pygame.error:
            print("Could not initialize sound. Running silent.")
            self.enabled = False
            return

        # Try to load each sound effect
        sound_files = {
            "sword_swing": "assets/sword_swing.wav",
            "enemy_hit": "assets/enemy_hit.wav",
            "enemy_death": "assets/enemy_death.wav",
            "item_pickup": "assets/item_pickup.wav",
            "chest_open": "assets/chest_open.wav",
            "player_hurt": "assets/player_hurt.wav",
            "door_open": "assets/door_open.wav",
        }

        for name, filepath in sound_files.items():
            try:
                sound = pygame.mixer.Sound(filepath)
                sound.set_volume(self.volume)
                self.sounds[name] = sound
                print(f"  Loaded sound: {filepath}")
            except (pygame.error, FileNotFoundError):
                self.sounds[name] = None
                print(f"  No sound file: {filepath} (silent)")
The play method checks if the sound exists before playing:
def play(self, sound_name):
    if not self.enabled:
        return
    sound = self.sounds.get(sound_name)
    if sound:
        sound.play()
If the sound is None (because the file wasn't found), nothing happens. No crash. That's the beauty of it.
Sound Effects vs Music
You know how in games there are two kinds of audio? Short clips that play when stuff happens (sword swing, enemy grunt, item pickup) and then a longer track that loops in the background? Pygame treats these differently.
Sound effects are those short clips. Pygame can play a bunch of them at the same time on separate "channels."
Background music is the longer track that loops continuously. Pygame has a special system for it: pygame.mixer.music. Only one music track can play at a time.
def play_music(self, track_name):
    filepath = self.music_files.get(track_name)
    if filepath:
        try:
            pygame.mixer.music.load(filepath)
            pygame.mixer.music.set_volume(self.volume * 0.5)
            pygame.mixer.music.play(-1)  # -1 means loop forever
        except (pygame.error, FileNotFoundError):
            print(f"No music file: {filepath}")
The -1 argument to play() means "loop forever." You could pass 0 for "play once" or 3 for "play 3 times."
We play dungeon music in normal rooms and switch to boss music when entering the boss room.
Volume Control
We let the player adjust volume with the + and - keys:
def volume_up(self):
self.set_volume(self.volume + 0.1)
def volume_down(self):
self.set_volume(self.volume - 0.1)
def set_volume(self, vol):
self.volume = max(0.0, min(1.0, vol)) # Clamp between 0 and 1
for sound in self.sounds.values():
if sound:
sound.set_volume(self.volume)
pygame.mixer.music.set_volume(self.volume * 0.5)That max(0.0, min(1.0, vol)) trick clamps the value between 0 and 1. Volume can't go below 0 or above 1. We set music a bit quieter (times 0.5) so it doesn't drown out the sound effects.
Where to Get Free Sounds
When you're ready to add real sound files, here are great free sources:
- OpenGameArt.org -- free game assets, tons of sounds
- freesound.org -- huge library of free sounds (need a free account)
- sfxr (or its web version jfxr) -- generates retro game sounds. Perfect for a dungeon crawler!
Download .wav files and put them in an assets/ folder next to your game. The SoundManager will automatically find and load them.
Step-by-Step Build
Step 1: The SoundManager class
Add the SoundManager class after the sprite functions. It handles initialization, loading, playing, and volume.
Step 2: Create sound manager in Game.__init__
self.sound = SoundManager()This goes right at the top of __init__, before building rooms.
Step 3: Play sounds at the right moments
Sprinkle self.sound.play(...) calls throughout the game logic:
# When player attacks
self.sound.play("sword_swing")
# When enemy takes damage
self.sound.play("enemy_hit")
# When enemy dies
self.sound.play("enemy_death")
# When player gets hurt
self.sound.play("player_hurt")
# When picking up an item
self.sound.play("item_pickup")
# When opening a chest
self.sound.play("chest_open")
# When going through a door
self.sound.play("door_open")Step 4: Music switching
Start dungeon music in __init__, switch to boss music when entering the boss room:
# In __init__
self.sound.play_music("dungeon")
# When entering boss room
if self.current_room == len(self.rooms) - 1:
self.sound.play_music("boss")
# When boss dies or game over
self.sound.stop_music()Step 5: Volume controls in handle_input
elif event.key == pygame.K_EQUALS or event.key == pygame.K_PLUS:
self.sound.volume_up()
elif event.key == pygame.K_MINUS:
self.sound.volume_down()Step 6: Volume display in HUD
Show the current volume so the player knows what level they're at:
vol_text = self.small_font.render(f"Vol: {int(self.sound.volume * 100)}% (+/-)", True, WHITE)
self.screen.blit(vol_text, (SCREEN_WIDTH - 160, SCREEN_HEIGHT - 25))The Full Game
The complete file is dungeon.py in this folder. It includes everything from Lesson 26 (sprites) plus the full sound system.
Run It!
python3 dungeon.pyWhen you run it, look at the terminal output. You'll see messages like:
Sound system initialized!
No sound file found: assets/sword_swing.wav (running silent for this effect)
No sound file found: assets/enemy_hit.wav (running silent for this effect)
...The game runs perfectly fine without sound files. But if you download some .wav files and put them in an assets/ folder, those messages will change to "Loaded sound!" and you'll hear them in-game.
Use arrow keys to move, Space to attack, 1-5 for items, +/- for volume.
Experiments
- Try the jfxr sound generator. Go to https://jfxr.frozenfractal.com in your browser. Generate a "hit" sound, export it as a .wav file, and save it as
assets/sword_swing.wav. Run the game -- you should hear it!
- Change the volume step. Instead of
self.volume + 0.1, try0.05for finer control or0.25for bigger jumps.
- Add a new sound event. Add a "level_up" sound that plays when you enter a new room for the first time.
- Make boss music switch back. Right now, once boss music starts, it stays. Make it switch back to dungeon music if you leave the boss room.
Challenge
Add a mute toggle. When the player presses M, all sound is muted. Press M again to unmute. Show "MUTED" on the HUD when sound is off. Hint: you'll need a self.muted variable in the SoundManager, and check it in the play() method.
Procedural Generation
Make every playthrough different by generating dungeons randomly with code instead of designing them by hand.
What Is Procedural Generation?
Up until now, every time you played Robert's Dungeons, the rooms were exactly the same. Same walls, same enemy positions, same chests. That works, but real dungeon crawlers like Minecraft Dungeons, Hades, and Spelunky are different every time you play. How do they pull that off?
Procedural generation is when a computer program builds game content using an algorithm (a set of steps) instead of a human designing it by hand. Instead of you typing out a tile map, you write code that creates the tile map.
Think of it like this: instead of drawing a maze on paper, you write instructions for how to draw a maze. Then the computer follows those instructions and makes a brand new maze every single time.
The Algorithm
Our dungeon generator follows these steps:
- Start with a big grid filled entirely with walls
- Pick random spots to place rectangular rooms (5-10 tiles wide, 5-8 tiles tall)
- Make sure rooms don't overlap -- check before placing each one
- Connect rooms with L-shaped corridors between their centers
- Place doors where corridors meet room edges
- Scatter enemies in rooms (2-4 per room)
- Put chests in a couple random rooms
- First room = player start, last room = boss room
Let's walk through each piece.
Step 1: Start with Walls
MAP_W = 60
MAP_H = 45
tile_map = [[WALL for _ in range(MAP_W)] for _ in range(MAP_H)]A 60x45 grid where every single tile is a wall. We'll "carve out" rooms and corridors from this solid block. You know how sculptors say the statue is already inside the block of marble? Same energy here.
Step 2: Place Rooms
A room is just a rectangle. We define it with position (x, y) and size (w, h):
class DungeonRoom:
def __init__(self, x, y, w, h):
self.x = x
self.y = y
self.w = w
self.h = h
self.center_x = x + w // 2
self.center_y = y + h // 2To place a room, we pick a random position and size, check if it overlaps with any existing room, and if not, carve it out:
w = rng.randint(5, 10)
h = rng.randint(5, 8)
x = rng.randint(1, MAP_W - w - 1)
y = rng.randint(1, MAP_H - h - 1)
new_room = DungeonRoom(x, y, w, h)
# Check for overlap
overlaps = False
for existing in rooms:
if new_room.intersects(existing, padding=2):
overlaps = True
break
if not overlaps:
rooms.append(new_room)
# Carve out floor tiles
for row in range(y, y + h):
for col in range(x, x + w):
tile_map[row][col] = FLOORThe intersects method checks if two rectangles overlap, with some padding so rooms aren't squished right up against each other:
def intersects(self, other, padding=1):
return (self.x - padding < other.x + other.w and
self.x + self.w + padding > other.x and
self.y - padding < other.y + other.h and
self.y + self.h + padding > other.y)Step 3: Connect Rooms with Corridors
Rooms by themselves are islands -- you can't get from one to another. We need corridors to connect them.
The simplest approach: connect each room to the next one in the list with an L-shaped corridor. Go horizontal from room 1's center to room 2's column, then vertical to room 2's center:
for i in range(len(rooms) - 1):
r1 = rooms[i]
r2 = rooms[i + 1]
# Horizontal tunnel
for col in range(min(r1.center_x, r2.center_x), max(r1.center_x, r2.center_x) + 1):
tile_map[r1.center_y][col] = FLOOR
tile_map[r1.center_y + 1][col] = FLOOR # 2 tiles wide
# Vertical tunnel
for row in range(min(r1.center_y, r2.center_y), max(r1.center_y, r2.center_y) + 1):
tile_map[row][r2.center_x] = FLOOR
tile_map[row][r2.center_x + 1] = FLOORWe make corridors 2 tiles wide so the player doesn't feel claustrophobic.
Seeds: Same Dungeon Every Time
Here's a really cool trick. Computers can't actually be truly random -- they use formulas that look random. If you give the formula the same starting number (called a seed), you get the exact same sequence of "random" numbers every time.
rng = random.Random(seed)We create our own random number generator with a specific seed. If you use seed 12345, you'll get the same dungeon every time. Seed 99999 gives a totally different dungeon -- but the same one every time you use 99999.
This is how games let you share "world seeds" with friends. You know how in Minecraft the seed determines the entire world? Same idea here.
Our title screen lets you type in a seed number or leave it blank for a random one. The seed is printed in the terminal and shown on the HUD so you can share cool dungeons with people.
One Big Map
Previous versions had separate room screens with door transitions. Now the entire dungeon is one big map. The player walks from room to room through corridors without any loading or transitions. The camera just follows the player smoothly across the whole dungeon.
This is actually simpler in some ways (no room transition code) but means enemies from all rooms exist on the map at once. We only create enemies at dungeon generation time, and they all update every frame. For our dungeon size this is totally fine -- there are maybe 15-20 enemies total.
Step-by-Step Build
Step 1: DungeonRoom class and generate_dungeon function
The DungeonRoom class stores position and size. The generate_dungeon(seed) function does all the heavy lifting and returns everything the game needs:
def generate_dungeon(seed):
# Returns: (tile_map, enemy_list, chest_positions,
# player_start, boss_pos, room_rects)Step 2: Title screen for seed input
Add a "title" state to the Game class. On this screen, the player can type a seed number or press Enter for a random dungeon.
if self.state == "title":
if event.key == pygame.K_RETURN:
if self.seed_input.strip():
seed = int(self.seed_input.strip())
else:
seed = None # Random
self.start_game(seed)Step 3: start_game method
This calls generate_dungeon() and creates all the game objects:
def start_game(self, seed=None):
if seed is None:
seed = random.randint(1, 999999)
self.seed = seed
print(f"Dungeon seed: {self.seed}")
result = generate_dungeon(self.seed)
self.tile_map, enemy_data, chest_pos, player_start, boss_pos, self.dungeon_rooms = result
# Create enemies, boss, player from the generated data
...Step 4: Exploration tracking
Instead of tracking room visits by index, we check which room rectangle contains the player:
def update_explored(self):
for i, room in enumerate(self.dungeon_rooms):
if (room.x <= self.player.x < room.x + room.w and
room.y <= self.player.y < room.y + room.h):
self.explored.add(i)
breakStep 5: Minimap shows explored rooms
The minimap scales all room rectangles to fit in a small corner display. Explored rooms are colored; unexplored ones are dim. A green dot shows the player's position.
Step 6: Optimize tile drawing
With a 60x45 map, we only draw tiles that are visible on screen:
start_col = max(0, self.camera_x // TILE_SIZE - 1)
end_col = min(map_w, (self.camera_x + SCREEN_WIDTH) // TILE_SIZE + 2)This way we draw maybe 27x20 tiles per frame instead of all 2700. Way faster.
The Full Game
The complete file is dungeon.py in this folder. It has the dungeon generator, all sprites, sound support, and the full game with title screen.
Run It!
python3 dungeon.pyYou'll see a title screen where you can enter a seed number. Press Enter. The dungeon generates and you're dropped in. Look at the minimap in the top-right corner to see the rooms you've explored. Check the terminal for the seed number.
Try entering seed 42 -- you'll always get the same dungeon. Try 12345 for a different one. Leave it blank and get a surprise.
Controls: Arrow keys to move, Space to attack, 1-5 for items, +/- for volume, Esc to quit.
Experiments
- Try different seeds. Enter seeds 1, 100, 999, 12345, and 555555. Notice how different the layouts are. Find a seed you like and share it!
- Change room count. In
generate_dungeon, changetarget_rooms = rng.randint(6, 8)torng.randint(10, 15)for a much bigger dungeon. Or try3, 4for a tiny one.
- Change room sizes. Make rooms bigger (
rng.randint(8, 15)) or smaller (rng.randint(3, 5)). Bigger rooms feel like arenas; smaller ones feel like closets.
- More enemies per room. Change
num_enemies = rng.randint(2, 4)torng.randint(5, 8)for a real challenge.
- Add more chests. Change the chest placement to put one in every room. You'll be swimming in loot.
Challenge
Add a difficulty selector on the title screen. Before entering a seed, let the player press 1 for Easy, 2 for Normal, or 3 for Hard. Easy means fewer enemies (1-2 per room) and more chests. Hard means more enemies (4-6 per room), the boss has 75 HP instead of 50, and player starts with only 7 health. Show the difficulty on the HUD.
Polish & Second Level
Add multiple levels, a new exploding enemy, a start screen, pause menu, high scores, and visual polish that makes the game feel professional.
Game States
Up until now, our game just starts and you play. But you know how real games have menus, pause screens, and game over screens? The trick is a game state variable -- just one string that controls what the game is doing right now:
self.state = "menu" # Can be: "menu", "playing", "paused", "game_over"In the game loop, you check the state and run different code:
if self.state == "menu":
self.draw_menu()
elif self.state == "playing":
self.update_game()
self.draw_game()
elif self.state == "paused":
self.draw_pause()
elif self.state == "game_over":
self.draw_game_over()This is way cleaner than having a bunch of boolean flags like is_paused, is_menu, is_game_over. One variable controls everything. Super elegant.
File I/O for High Scores
Python makes reading and writing files surprisingly easy. We'll save the top 5 scores to a text file so they stick around even after you close the game:
# Writing scores
def save_high_scores(self):
with open("highscores.txt", "w") as f:
for score in self.high_scores[:5]:
f.write(str(score) + "\n")
# Reading scores
def load_high_scores(self):
try:
with open("highscores.txt", "r") as f:
return [int(line.strip()) for line in f.readlines() if line.strip()]
except FileNotFoundError:
return []The try/except handles the first time you play -- there's no file yet, so we just return an empty list. Remember that pattern from Lesson 27? Same idea. The with statement automatically closes the file when we're done. Always use with for files!
Particle Effects
When an enemy dies, we want a burst of colored dots flying outward. Think of it like a tiny firework. Each particle has a position, velocity, color, and a life counter that ticks down:
class Particle:
def __init__(self, x, y, color):
self.x = x
self.y = y
angle = random.uniform(0, 2 * math.pi)
speed = random.uniform(1, 4)
self.dx = math.cos(angle) * speed
self.dy = math.sin(angle) * speed
self.color = color
self.life = 20
def update(self):
self.x += self.dx
self.y += self.dy
self.life -= 1The math here uses cos and sin to shoot particles in random directions -- basically picking a random angle around a circle and launching the dot that way. Each frame, the particle moves by its velocity and loses 1 life. When life hits 0, we remove it.
We draw each particle as a small circle that shrinks as it fades:
def draw(self, screen, cam_x, cam_y):
if self.life > 0:
alpha = int(255 * self.life / 20)
r, g, b = self.color
faded = (max(0, min(255, r)), max(0, min(255, g)), max(0, min(255, b)))
size = max(1, self.life // 5)
pygame.draw.circle(screen, faded, (int(self.x - cam_x), int(self.y - cam_y)), size)Screen Shake
This is one of the simplest tricks that makes a game feel 10x better. You know how in movies, when something explodes, the camera shakes? Same idea. Fortnite uses screen shake when a rocket launcher explodes nearby, and Zelda shakes the screen when you land a charged attack. It's a tiny detail that makes everything feel way more powerful. When the player takes damage, we offset the entire draw by a random few pixels:
self.shake_frames = 0
# When player gets hit:
self.shake_frames = 10
# In the draw function:
shake_x, shake_y = 0, 0
if self.shake_frames > 0:
shake_x = random.randint(-3, 3)
shake_y = random.randint(-3, 3)
self.shake_frames -= 1Then add shake_x and shake_y to the camera offset. The whole screen jitters for 10 frames, then stops. It's subtle but it makes hits feel so much more impactful.
The Creeper Enemy
Creepers are the scariest enemy type. They chase you like skeletons, but slower. When they get within 3 tiles, they start a countdown -- flashing faster and faster. After 3 seconds, they explode and deal 5 damage to anything nearby. Yeah, you want to run.
Sound familiar? These work exactly like Creepers in Minecraft — they sneak up, start hissing, and if you don't run... boom. We even named them Creepers as a tribute!
class Creeper(Enemy):
def __init__(self, x, y):
super().__init__(x, y, "creeper")
self.fuse_timer = 0
self.fuse_max = 90 # 3 seconds at 30 fps
self.armed = FalseThe flashing effect is really cool -- we toggle the color every few frames, and the toggle speed increases as the timer counts down:
flash_speed = max(2, 10 - (self.fuse_timer // 10))
if self.fuse_timer % flash_speed < flash_speed // 2:
color = (255, 255, 255) # Flash whiteCreepers only appear on Level 2 and beyond, so you get a nasty surprise when you advance.
Multiple Levels
After beating the boss, a staircase tile (type 4) appears. Walk on it and you go to Level 2 -- a brand new procedurally generated dungeon with a different seed. Enemies on Level 2 have 1.5x health and 1.3x speed. Level 3 scales even more. It keeps getting harder.
def next_level(self):
self.level += 1
self.generate_dungeon(seed=self.seed + self.level)
self.level_text_timer = 90 # Show "LEVEL X" for 3 secondsStep-by-Step Build
The full file includes everything from lessons 12-20, plus:
Particleclass for death effectsCreeperenemy type with fuse/explosion- Game state system: menu, playing, paused, game_over
- Start screen with title and high score display
- Pause menu (Escape key)
- High score file I/O
- Screen shake on damage
- Multiple levels with scaling difficulty
- Level transition with staircase tile
- WASD movement support (alongside arrow keys)
The complete code is in dungeon.py -- it's our biggest file yet!
Run It!
python3 dungeon.pyYou'll see the start screen first. Press SPACE to begin. Move with arrows or WASD, attack with Space. Press Escape to pause. Beat the boss to find the staircase to Level 2!
Experiments
- Crank up the particles -- change the particle count from
range(10)torange(50). It looks like fireworks! - More screen shake -- change the random range from
(-3, 3)to(-10, 10). Earthquakes! - Creeper damage -- change the explosion damage from 5 to 20. Now they're terrifying.
- Speed run scaling -- change the health multiplier from 1.5 to 3.0 per level. Level 3 will be brutal.
- Longer fuse -- change
fuse_maxfrom 90 to 30 (1 second). Creepers barely give you time to run!
Challenge
Add a score multiplier that increases by 0.1x for each kill without taking damage. Getting hit resets it to 1.0x. Display the current multiplier on the HUD (like "x1.5"). This rewards skillful play and makes high scores much more interesting.
Co-op Mode
Add a second player to the dungeon so two people can fight through it together on the same keyboard.
The Power of Code Reuse
Right now our Player class is hard-coded to use arrow keys and Space. But what if we could make it use any keys? That's the magic of configuration -- instead of baking in specific keys, we pass them in as a parameter.
This is exactly how every multiplayer game works. Fortnite doesn't write separate code for each of the 100 players in a match — it uses one Player class and creates 100 instances of it, each with their own position, health, and inventory.
Here's the trick: we use a dictionary to map actions to keys:
P1_CONTROLS = {
"up": pygame.K_UP,
"down": pygame.K_DOWN,
"left": pygame.K_LEFT,
"right": pygame.K_RIGHT,
"attack": pygame.K_SPACE,
}
P2_CONTROLS = {
"up": pygame.K_w,
"down": pygame.K_s,
"left": pygame.K_a,
"right": pygame.K_d,
"attack": pygame.K_f,
}Now the Player class takes a controls dict:
class Player:
def __init__(self, x, y, controls, color):
self.controls = controls
self.color = color
# ... everything elseAnd in the input handling, we check self.controls["up"] instead of pygame.K_UP. One class, two totally different control schemes. This is one of the most important ideas in programming: write code once, use it many ways. You wrote the Player class once, and now it works for any number of players just by passing in different controls.
Midpoint Camera
With two players, where should the camera look? Think about it -- you can't just follow Player 1 because then Player 2 might be off-screen. The answer: aim right between them. We calculate the midpoint, which is just the average of both positions:
camera_x = (p1.x + p2.x) / 2 * TILE_SIZE - SCREEN_WIDTH // 2
camera_y = (p1.y + p2.y) / 2 * TILE_SIZE - SCREEN_HEIGHT // 2This keeps both players visible as long as they stay reasonably close. If they wander too far apart, one might go off-screen -- that's part of the co-op challenge! Stick together!
The Ghost Mechanic
When a player dies, the game doesn't end immediately. Instead, they become a ghost -- their sprite turns semi-transparent. They can't move or fight, but they're still on screen.
Here's the cool part: pressing their attack key respawns them with 5 HP, but only once per room. So if your partner goes down, you need to survive long enough for them to come back. It creates these super tense moments -- exactly what co-op games are all about.
if player.dead and not player.used_respawn:
player.health = 5
player.dead = False
player.used_respawn = TrueSeparate Inventories
Each player has their own inventory. Player 1 uses keys 1-5, Player 2 uses keys 6-0. This means you have to decide who gets the health potions and who gets the power swords. Communication is key! Talk to each other!
# Player 1 items: keys 1-5
# Player 2 items: keys 6, 7, 8, 9, 0Start Screen Selection
The start screen now lets you choose 1 Player or 2 Players by pressing the 1 or 2 key. In single-player mode, everything works exactly like Lesson 29.
Step-by-Step Build
This is the final, complete version of the dungeon crawler! It includes everything:
- Refactored
Playerclass with configurable controls and colors - Player 2 with WASD + F controls
- Midpoint camera between both players
- Ghost/respawn mechanic for dead players
- Separate inventories (1-5 for P1, 6-0 for P2)
- Player count selection on start screen
- Combined kill count for scoring
- Everything from Lesson 29: levels, creepers, particles, screen shake, high scores, pause, etc.
Run It!
python3 dungeon.pyOn the start screen, press 1 for solo or 2 for co-op. Player 1 uses arrow keys + Space. Player 2 uses WASD + F. Survive together!
Experiments
- Three players -- try adding a third Player with IJK + L controls. You'll need to update the camera midpoint calculation to average three positions.
- PvP mode -- make players' attacks damage each other. Friendly fire!
- Shared health pool -- instead of separate health bars, both players share one big health bar. When either gets hit, it drains.
- Revive hug -- instead of pressing a key to respawn, make the alive player stand next to the ghost for 3 seconds to revive them.
- Different classes -- give Player 1 more health but less damage, and Player 2 more damage but less health. A tank and a glass cannon!
Challenge
Add a trading system: when both players stand next to each other and one presses T, they drop their selected inventory item on the ground. The other player can pick it up. This lets players share health potions strategically.
Isometric Basics
Learn what isometric perspective is and build a scrollable diamond-shaped grid -- the foundation for making your dungeon look like Minecraft Dungeons.
What Is Isometric?
You know how in Minecraft Dungeons, you look down at the world from an angle? Everything looks 3D, but you can't rotate the camera -- it's always that same tilted view. That's isometric perspective.
It's a trick. The game is still 2D (flat images on your screen), but by drawing everything at an angle, it looks 3D. Your dungeon goes from looking like a boring checkerboard to looking like an actual place you could walk around in.
Other games that use isometric view: Hades, Diablo, Animal Crossing (sort of), and the original Pokemon Mystery Dungeon.
The Magic Math
Here's the big idea. Right now, converting a grid position to screen position is simple:
screen_x = grid_x * tile_size
screen_y = grid_y * tile_sizeThat gives you a flat, top-down grid. Boring. For isometric, we use two different formulas:
screen_x = (grid_x - grid_y) * (tile_width // 2)
screen_y = (grid_x + grid_y) * (tile_height // 2)Why does this work? The subtraction in screen_x makes the grid slant sideways -- moving right on the grid goes down-right on screen. The addition in screen_y makes everything stack diagonally. Together, your square grid becomes a diamond.
The tile_width is usually twice the tile_height. A common size is 64 wide by 32 tall -- this gives you that classic isometric diamond shape.
Step by Step
Here's what [isometric_grid.py](isometric_grid.py) builds:
- Grid setup -- a 2D list where some tiles are colored differently
- Iso conversion function -- the math that turns grid positions into screen positions
- Diamond tile drawing -- each tile is drawn as a diamond (4-point polygon)
- Scrolling camera -- use arrow keys to pan around the grid
- Grid coordinates display -- hover over tiles to see their grid position
The Code
python3 isometric_grid.pyUse arrow keys to scroll around the grid. Hover your mouse over tiles to see their grid coordinates. The green tiles are randomly placed -- every time you run it, the pattern changes.
Why Diamonds?
In a normal top-down view, each tile is a square. In isometric view, that square gets rotated 45 degrees and squished vertically. That's why each tile looks like a diamond. It's the same grid, just viewed from an angle.
Think of it like looking at a chess board from the corner instead of straight above. The squares become diamonds, but the grid is still 8x8.
Experiments
- Bigger grid -- change
GRID_SIZEto 30 and scroll around. How does it feel compared to a flat grid? - Checkerboard -- color tiles based on
(grid_x + grid_y) % 2to make an isometric checkerboard pattern. - Height preview -- for green tiles, draw the diamond 10 pixels higher than normal. Notice how it starts to look like a raised platform?
- Tile sizes -- try
TILE_WIDTH = 128, TILE_HEIGHT = 64. Bigger tiles! Then try96x48. How does the aspect ratio change the feel? - Click to paint -- add click detection: when you click a tile, toggle its color between green and gray. You'll need to reverse the isometric formula (this is tricky!).
The isometric formulas screen_x = (gx - gy) × (tile_width / 2) and screen_y = (gx + gy) × (tile_height / 2) are a coordinate transformation — converting from one system (grid) to another (screen). This is the same math used in 3D graphics, map projections, and even GPS. When you rotate a Minecraft world to see it from an angle, the game is doing exactly this kind of transformation on every single block.
Challenge
Add elevation. Give some tiles a height value of 1 or 2. Draw those tiles higher on the screen (subtract height * 16 from their screen_y). Then draw the sides of the raised tiles as darker rectangles to make them look like 3D blocks. You're basically building Minecraft at this point.
Isometric Dungeon
Take your dungeon's tile map and render it in isometric view -- floors become diamonds, walls become tall blocks, and your player walks through it all like Minecraft Dungeons.
From Flat to Isometric
In the last lesson, you drew a simple colored grid in isometric. Now we're going to take your actual dungeon -- walls, floors, doors -- and render it the same way. The grid data doesn't change at all. Only how we draw it changes.
This is one of the coolest things about good code structure: your generate_map() function doesn't care if the map is drawn top-down or isometric. It just makes the data. The rendering is separate.
Walls Need Height
Floors are flat diamonds, just like last lesson. But walls need to look like tall blocks -- like the stone blocks in Minecraft Dungeons.
The trick: draw the top face of a wall at a higher position (subtract height from screen_y), then draw side faces connecting the top to the ground. Two side faces are enough -- the left side and the right side of the diamond.
# Floor: just a diamond at ground level
# Wall: diamond drawn higher + side panels connecting to ground
wall_height = 40 # pixels tall
top_y = screen_y - wall_heightThis creates the illusion of a 3D block sitting on the ground.
Camera Follows Player
The camera needs to follow the player, but now in isometric space. Convert the player's grid position to isometric screen coordinates, then center the camera on that point:
player_iso_x, player_iso_y = grid_to_iso(player.grid_x, player.grid_y)
cam_x = player_iso_x - SCREEN_WIDTH // 2
cam_y = player_iso_y - SCREEN_HEIGHT // 2The player still moves on the grid (up/down/left/right), but everything is drawn in isometric.
Step by Step
Here's what [isometric_dungeon.py](isometric_dungeon.py) builds:
- Procedural map -- reuses
generate_map()from earlier lessons - Isometric rendering -- floors as diamonds, walls as tall blocks with side faces
- Player on the grid -- moves with arrow keys, position converted to isometric for drawing
- Smooth camera -- follows player's isometric position
- Doors and chests -- special tiles with unique colors
The Code
python3 isometric_dungeon.pyUse arrow keys to move your player through the dungeon. The green diamond is you. Brown blocks are walls. Darker tiles are floors. Yellow diamonds are chests, and blue are doors.
It Looks Wrong... Sometimes
You might notice something weird: sometimes the player appears in front of a wall that should be blocking them, or behind a floor tile. Things overlap in the wrong order.
This is called the depth sorting problem, and it's totally normal. In a flat top-down view, you just draw the floor first and the player on top. In isometric view, the draw order depends on where things are in the grid. We'll fix this properly in the next lesson.
For now, enjoy the fact that your dungeon looks like an actual 3D place!
Experiments
- Wall colors -- give different rooms different wall colors. Use the room index to pick from a color list.
- Taller walls -- change
WALL_HEIGHTto 60 or 80. How does it change the feel? What about 20 for a low-wall style? - Animated player -- make the player diamond pulse (grow and shrink slightly) using a sine wave timer.
- Minimap -- draw a tiny flat top-down version of the map in the corner, showing where the player is. Two views of the same data!
- Torch glow -- place orange circles at certain floor tiles to simulate torchlight. In isometric, the glow should be an ellipse, not a circle.
Challenge
Add floor patterns. Instead of plain gray floors, alternate between two shades of gray in a checkerboard pattern ((gx + gy) % 2). Then add some random "cracked" floor tiles that are a slightly different color. Small details like this make the dungeon feel way more real.
Depth Sorting
Fix the drawing order so walls, floors, and characters overlap correctly -- using the Painter's Algorithm to draw back-to-front, just like real isometric games do.
The Problem
In the last lesson, you probably noticed the player sometimes appearing on top of walls that should be in front of them. Or walls from the bottom of the screen drawing over walls that should be closer.
This happens because we drew tiles in a simple loop: row by row, left to right. But in isometric view, "closer to the camera" isn't just about the row -- it's about the diagonal position.
The Painter's Algorithm
Imagine you're painting a scene on canvas. You paint the farthest things first (background mountains), then closer things on top (trees), then the closest things last (a person in front). Each new layer covers what's behind it.
That's the Painter's Algorithm: sort everything by distance, then draw far-to-near.
In isometric view, the "distance" of a tile is simply:
depth = grid_x + grid_yLower depth = farther from camera (drawn first). Higher depth = closer to camera (drawn last, on top). This works because in our isometric view, things in the bottom-right of the grid are "closer" to the viewer.
Where Does the Player Go?
The player (and enemies) aren't tiles -- they're between tiles. But they still need a depth value:
player_depth = player.grid_x + player.grid_yWhen sorting, the player gets drawn at the right moment: after the tiles behind them, before the tiles in front of them. If a wall has depth = 8 and the player has depth = 7, the wall draws on top -- the player is hidden behind it. Exactly right!
Drawing Walls with Depth
Walls are taller than floors, so they need extra care. The wall's base determines its depth (where it sits on the ground). The tall part extends upward, which means it visually covers tiles that are "behind" it. As long as we sort by the base position, it all works out.
We also draw the left and right side faces of each wall block to give them a solid 3D appearance.
Step by Step
Here's what [isometric_depth.py](isometric_depth.py) builds:
- Depth-sorted rendering -- all tiles and entities sorted by
grid_x + grid_y - Player and enemies in the sort -- characters are inserted into the draw order at the right depth
- Proper wall occlusion -- player hides behind walls correctly
- Multiple enemies -- zombies that wander the dungeon, drawn at correct depth
- Wall side faces -- left and right faces give walls a solid 3D look
The Code
python3 isometric_depth.pyUse arrow keys to move. Watch how the player goes behind walls that are in front of them, and in front of walls that are behind them. The zombies (red diamonds) also sort correctly. Press Space to attack.
Why This Matters
Depth sorting is what separates "isometric-looking" from "actually isometric." Without it, the illusion breaks -- things pop in front of each other randomly and your brain can't make sense of the space. With it, your eyes automatically see a 3D room.
Every isometric game does this. Minecraft Dungeons, Hades, Diablo -- they all sort their draw order every single frame.
Experiments
- Debug mode -- press D to toggle showing each tile's depth number drawn on it. Great for understanding the sort order.
- More enemies -- add 10 zombies. Do they all sort correctly against walls and each other?
- Depth tinting -- make farther tiles slightly darker and closer tiles slightly brighter. This adds atmospheric depth.
- Moving walls -- (just for fun) make one wall tile slowly move. Watch how the depth sorting keeps it correct even when moving.
- Tall vs short walls -- give some walls double height. The depth sort still works because it's based on the base position, not the visual height.
Challenge
Add pillars -- single-tile walls in the middle of rooms. They should be thinner than regular walls (draw them as a narrow diamond with tall sides). The player should be able to walk around them, appearing in front or behind depending on position. This really tests your depth sorting!
The Full Game
Build the grand finale -- a complete isometric dungeon crawler with enemies, combat, loot, health bars, and a HUD. Your Minecraft Dungeons-style game is done!
By the end of this section, you'll have built a game just like this one. Arrow keys to move, Space to attack!
Everything Comes Together
You've spent this whole course building up skills one by one. Variables, loops, classes, Pygame, procedural generation, combat, loot, co-op... and now isometric rendering with depth sorting.
This lesson takes everything and puts it into one complete game. This is YOUR game. You built every piece of it.
Combat in Isometric
The player attacks in the direction they're facing, but now we draw the attack in isometric space. The attack range is still grid-based (check grid distance to enemies), but the visual effect -- the swing animation -- gets converted through the isometric formulas.
# Check if enemy is in attack range (grid distance)
dist = abs(enemy.grid_x - player.grid_x) + abs(enemy.grid_y - player.grid_y)
if dist <= attack_range:
enemy.take_damage(player.damage)The grid logic stays simple. Only the drawing changes.
Health Bars Above Characters
In isometric view, health bars float above characters. Convert the character's grid position to isometric screen position, then draw the bar a few pixels higher:
iso_x, iso_y = grid_to_iso(entity.grid_x, entity.grid_y)
bar_x = iso_x - cam_x - 15
bar_y = iso_y - cam_y - 30
pygame.draw.rect(screen, RED, (bar_x, bar_y, 30, 4))
pygame.draw.rect(screen, GREEN, (bar_x, bar_y, 30 * hp_pct, 4))The HUD Is Flat
Here's an important design choice: the HUD (health display, inventory, score) is drawn in regular flat 2D, right on top of the isometric world. It doesn't rotate or slant -- it's a UI overlay.
This is exactly what Minecraft Dungeons does. The world is isometric, but your health bar, minimap, and item slots are flat rectangles at the edges of the screen.
Step by Step
Here's what [isometric_game.py](isometric_game.py) builds:
- Procedural isometric dungeon -- generated map rendered in full isometric
- Player with attack -- move with arrows, attack with Space
- Three enemy types -- zombies (slow), skeletons (ranged), creepers (explosive)
- Depth-sorted rendering -- everything draws in correct order
- Loot drops -- enemies drop health potions and damage boosts
- Health bars -- above every character, in isometric space
- HUD overlay -- flat UI showing health, score, and inventory
- Stairs to level 2 -- beat the floor, find the stairs, go deeper
The Code
python3 isometric_game.pyUse arrow keys to move, Space to attack, E to pick up items, 1-3 to use inventory items. Find the stairs to reach level 2 where enemies are tougher!
Look What You Built
Take a moment. Seriously. You started this course printing "Hello World" to a black terminal. Now you've built a full isometric dungeon crawler with procedural generation, multiple enemy types, a combat system, loot, depth sorting, and a HUD.
That's not a tutorial project. That's a real game. The same concepts you used here are the same ones used in Minecraft Dungeons, Hades, and Diablo.
Taking It Further
Scroll back up and play that demo again. Let's break down the advanced features and how they work.
Smooth Movement
Instead of snapping from tile to tile, characters glide between positions. The trick: keep track of where you ARE and where you're GOING, then interpolate between them each frame.
# moveT counts down from 6 to 0 over 6 frames
progress = 1 - (move_timer / 6)
draw_x = old_x + (new_x - old_x) * progress
draw_y = old_y + (new_y - old_y) * progressThe game logic still works on a grid. Only the drawing smooths it out. This is the same technique Minecraft uses — entities are on a grid internally but rendered smoothly.
4 Enemy Types with Different AI
Each enemy type has its own behavior, defined by a simple ai field:
if ai == 'wander': # Zombie: pick a random direction
dx, dy = random.choice([(0,-1),(0,1),(-1,0),(1,0)])
elif ai == 'chase': # Skeleton: move toward the player
if enemy.x < player.x: dx = 1
elif enemy.x > player.x: dx = -1
elif ai == 'diagonal': # Bat: move diagonally, erratic
dx = random.choice([-1, 1])
dy = random.choice([-1, 1])
elif ai == 'ranged': # Goblin: keep distance, throw projectiles
if distance < 3: # Too close! Run away
dx = -direction_to_player
elif distance < 6: # In range! Throw a projectile
projectiles.append(Projectile(enemy.x, enemy.y, toward_player))Same if/elif you learned in lesson 6. Each enemy just makes a different decision.
Particle Effects
Particles are tiny colored dots that spray out and fade away. Each one is just an object with a position, velocity, and lifetime:
def add_particles(x, y, color, count):
for i in range(count):
particles.append({
'x': x, 'y': y,
'vx': random.uniform(-2, 2), # Random horizontal speed
'vy': random.uniform(-3, 0), # Shoot upward
'life': 20, # Frames until it disappears
'color': color
})
# Each frame, update every particle
for p in particles:
p['x'] += p['vx']
p['y'] += p['vy']
p['vy'] += 0.1 # Gravity pulls them down
p['life'] -= 1
# Remove dead particles
particles = [p for p in particles if p['life'] > 0]That's it. A list of tiny objects with physics. When you attack, spawn 10 pink particles. When an enemy dies, spawn 20 in their color. Instant game juice.
Screen Shake
This one is embarrassingly simple and embarrassingly effective:
if player_got_hit:
shake_duration = 8 # Shake for 8 frames
if shake_duration > 0:
camera_x += random.uniform(-3, 3) # Jiggle the camera
camera_y += random.uniform(-3, 3)
shake_duration -= 1Three lines of code. Makes the game feel 10x more impactful. Every action game uses this — Zelda, Mario, F1 games when you crash.
Sound Effects (No Files Needed)
The demo generates sounds mathematically using Web Audio. In Python with Pygame, you'd load .wav files:
pygame.mixer.init()
swing_sound = pygame.mixer.Sound('swing.wav')
hit_sound = pygame.mixer.Sound('hit.wav')
# Play when something happens
def attack():
swing_sound.play()
if enemy_hit:
hit_sound.play()But the demo shows you can also generate sounds from code — using oscillators and frequency sweeps. A sword swing is a quick sawtooth wave dropping from 200Hz. An enemy death is a descending tone from 300Hz to 50Hz. Math becomes music.
Goblin Projectiles
The goblin throws projectiles — objects that travel across the grid and hurt the player on contact:
if goblin.distance_to_player < 6 and cooldown <= 0:
direction = toward_player()
projectiles.append({
'x': goblin.x, 'y': goblin.y,
'dx': direction.x, 'dy': direction.y,
'life': 10
})
cooldown = 40 # Can't shoot again for 40 frames
# Each frame, move projectiles
for p in projectiles:
p['x'] += p['dx']
p['y'] += p['dy']
if p['x'] == player.x and p['y'] == player.y:
player.hp -= 1 # Ouch!Projectiles are just items that move. Same concept as the snake's body or a falling Connect 4 chip — objects in a list, updated each frame.
Props & Decoration
Barrels, torches, and crates are placed randomly in rooms during map generation:
for room in rooms:
for i in range(2): # 2 props per room
x = random.randint(room.x + 1, room.x + room.width - 2)
y = random.randint(room.y + 1, room.y + room.height - 2)
prop_type = random.choice(['barrel', 'torch', 'crate'])
props.append({'x': x, 'y': y, 'type': prop_type})They're drawn in the depth-sorted render list just like enemies and the player. Torches even have a tiny flickering particle effect.
Minecraft Dungeons was built by a team of ~60 professional developers over several years. You built your own version from scratch. That's incredible.
Experiments
- Boss room -- add a boss that spawns in the largest room. Give it 3x health and a unique color. It drops a special item when defeated.
- Ranged attack -- add a projectile that travels in the direction the player faces. It needs its own depth value that updates as it moves across the grid.
- Day/night cycle -- slowly tint the entire screen darker, then lighter. At "night," enemies get faster. At "day," loot is worth more.
- Co-op isometric -- combine this with lesson 31's co-op code. Two players in isometric view! The camera centers between both players.
- Sound effects -- add attack sounds, damage sounds, and item pickup sounds from lesson 28. Audio brings everything to life.
Challenge
Add a shop room. One room in the dungeon has a merchant (purple diamond) who doesn't move or attack. When you stand next to them and press B, a flat shop menu opens showing items you can buy with gold (dropped by enemies). This combines flat UI with isometric world interaction -- exactly how shops work in real isometric games.